[ Return to Index: Getting Started with the ndau NFT Forge ]
[ Back Up to Step 4: Set up your Shopify store ]
NFT Forge – Step 5: Connect your ndau NFT Forge with your Shopify store
Next you need to connect your ndau NFT Forge with Shopify store. This will let you easily sell your NFTs to anyone visiting your store.
Eventually we’ll be releasing a Forge App right in the Shopify App store that will let you connect your ndau NFT Forge. But for now, simply go through this short manual process of setting up a private app. Don’t worry, we’ll walk you through each step!
Also, if you have any issues at all regarding connecting your Forge to Shopify, please contact beasysupport@easybeasy.com for direct assistance.
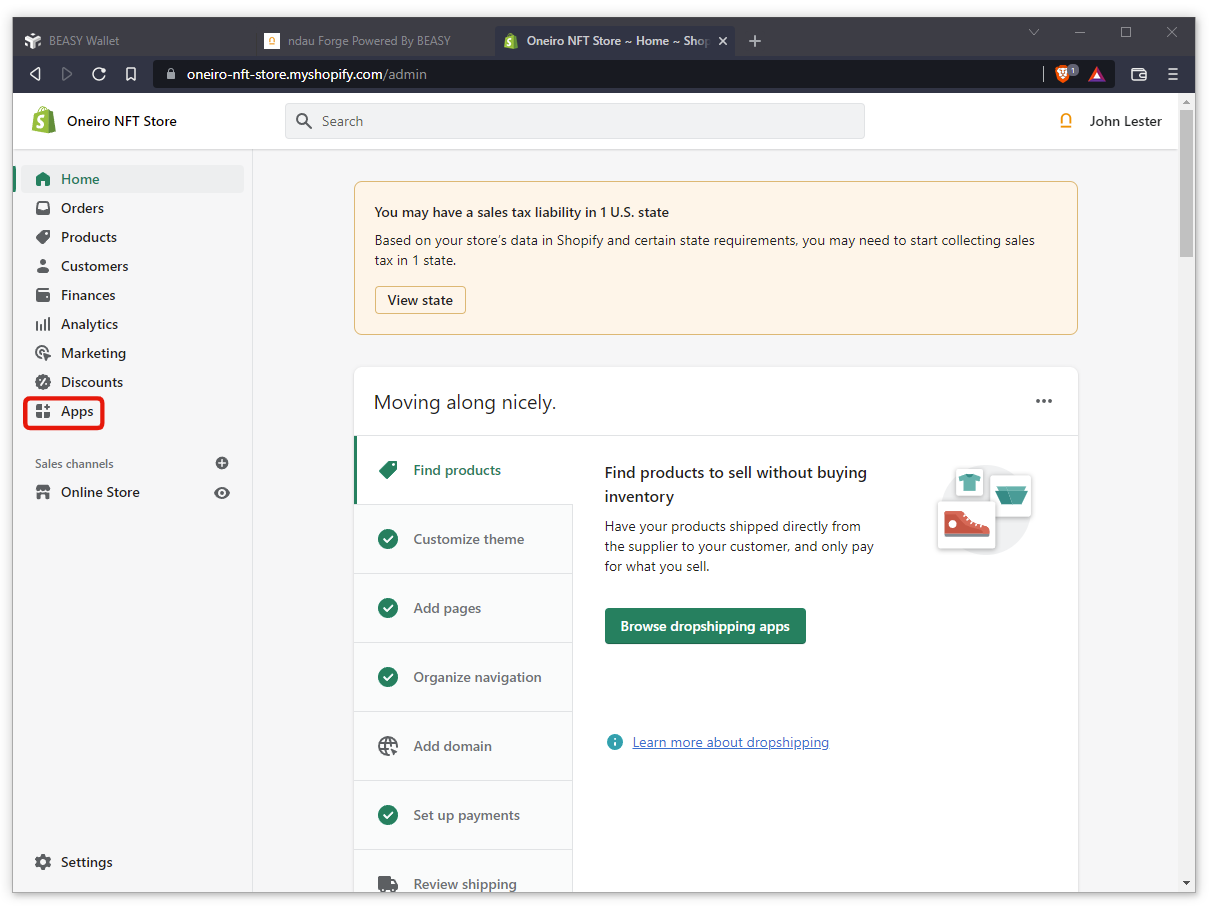
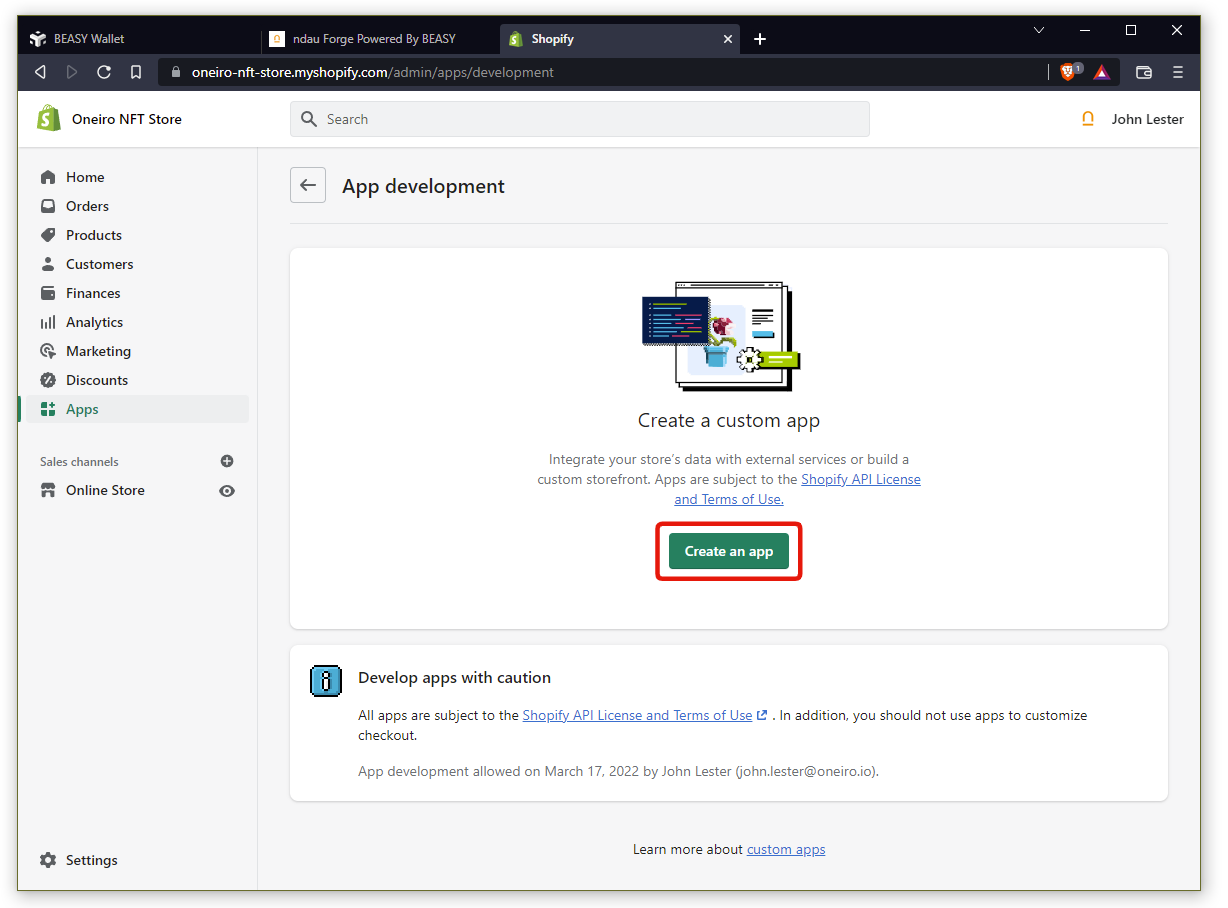
First, log in to your Shopify store and click on Apps.
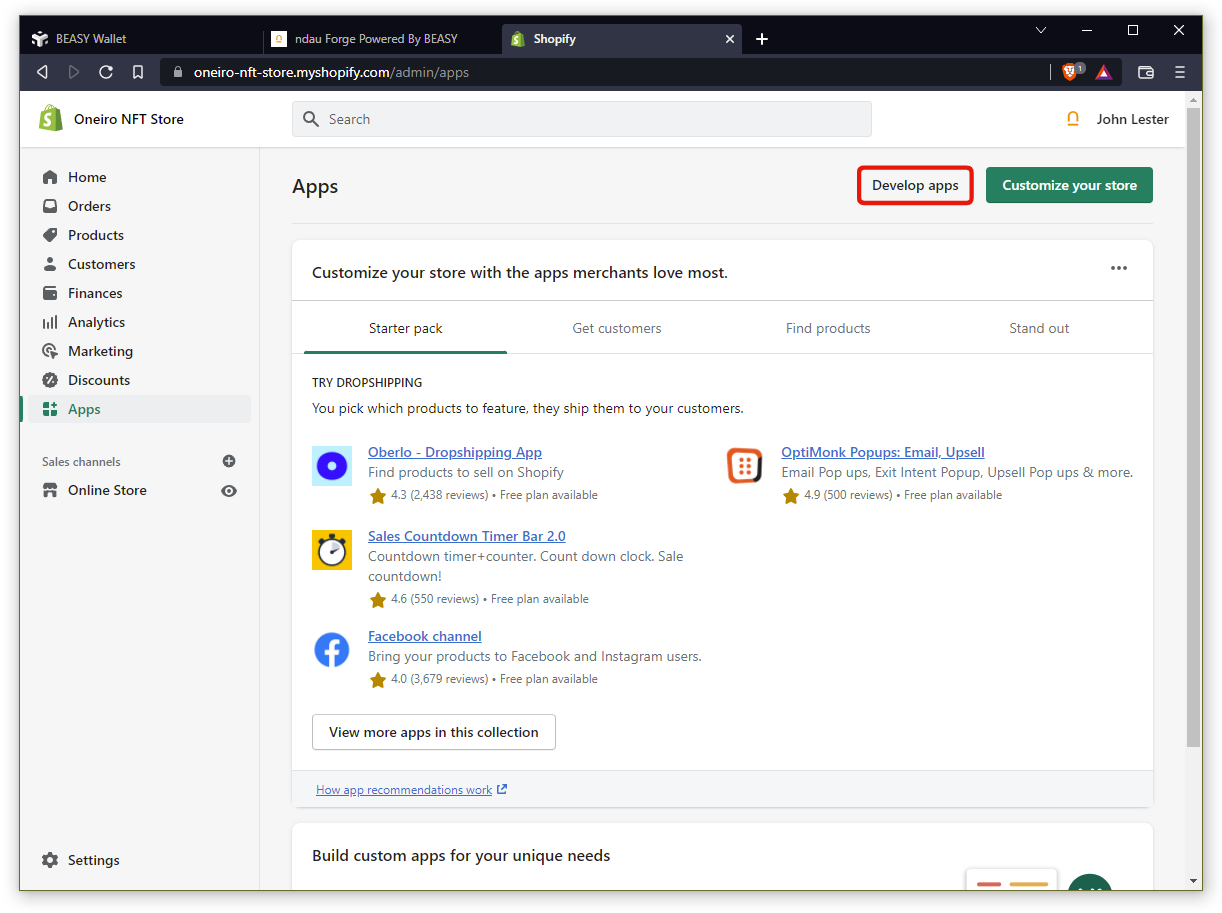
Now click on the Develop Apps link.
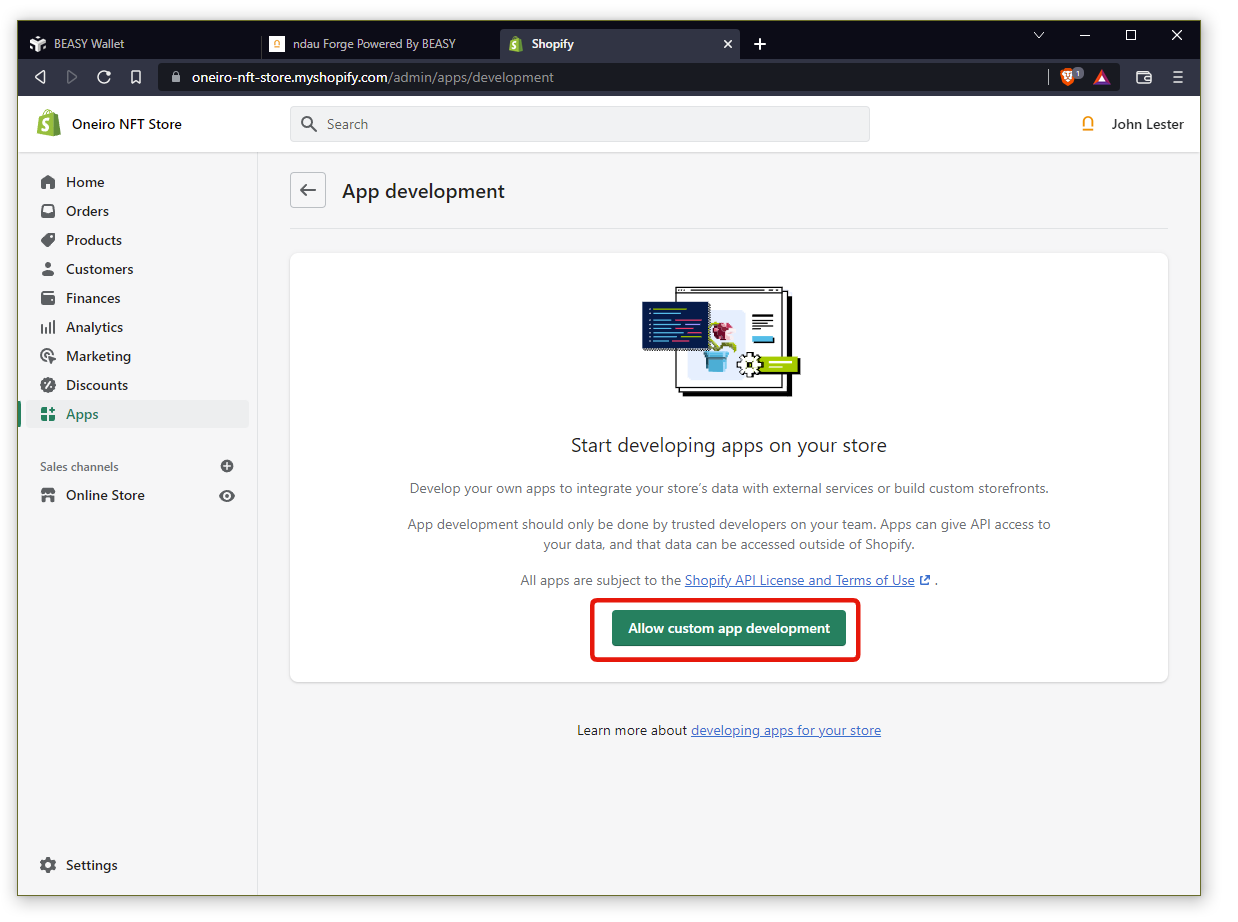
Click on the Allow custom app development button.
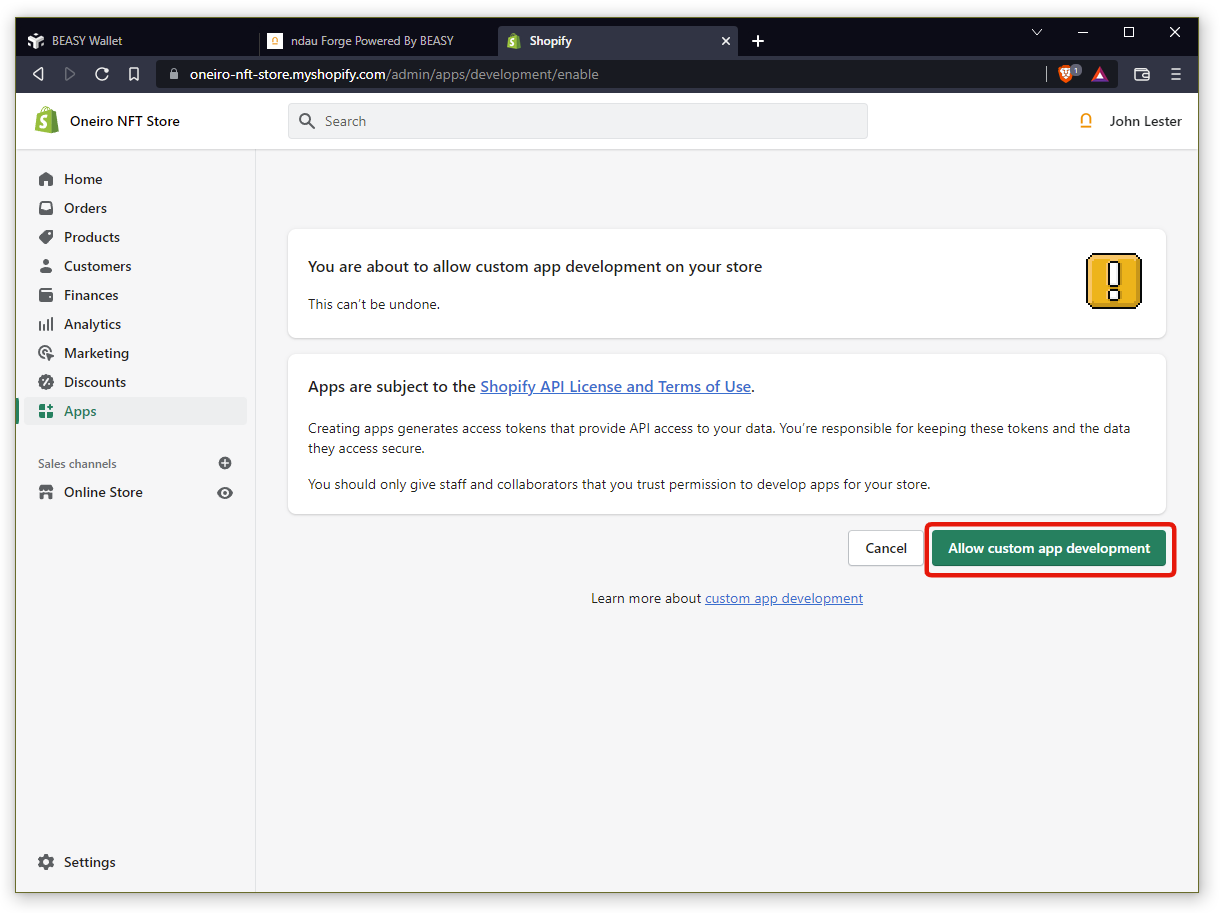
You’ll see another page explaining more about custom apps. Go ahead and click the Allow custom app development button.
Click on the Create an app button.
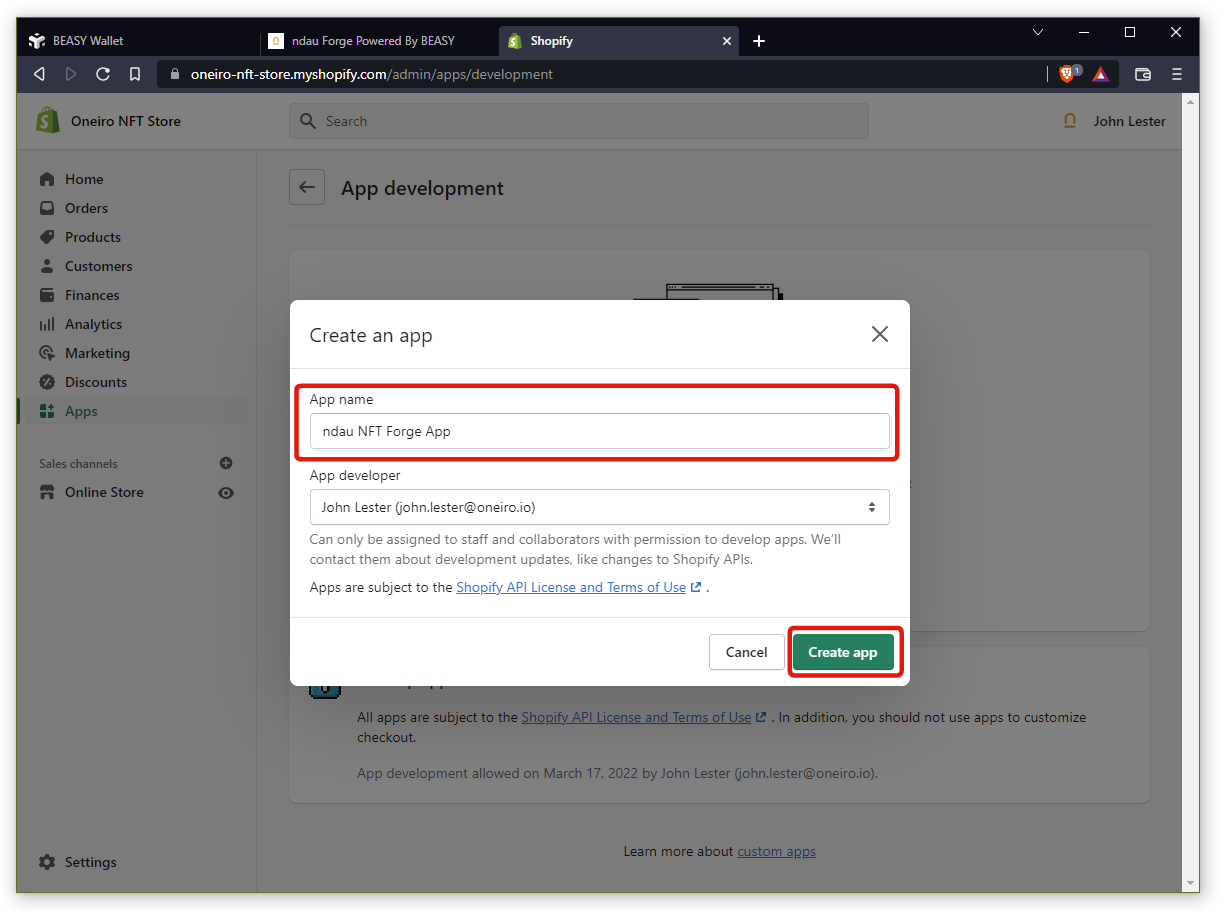
You can name this app anything you wish, but we recommend you name it something like “ndau NFT Forge App.” Leave your email in the App developer field and click the Create app button.
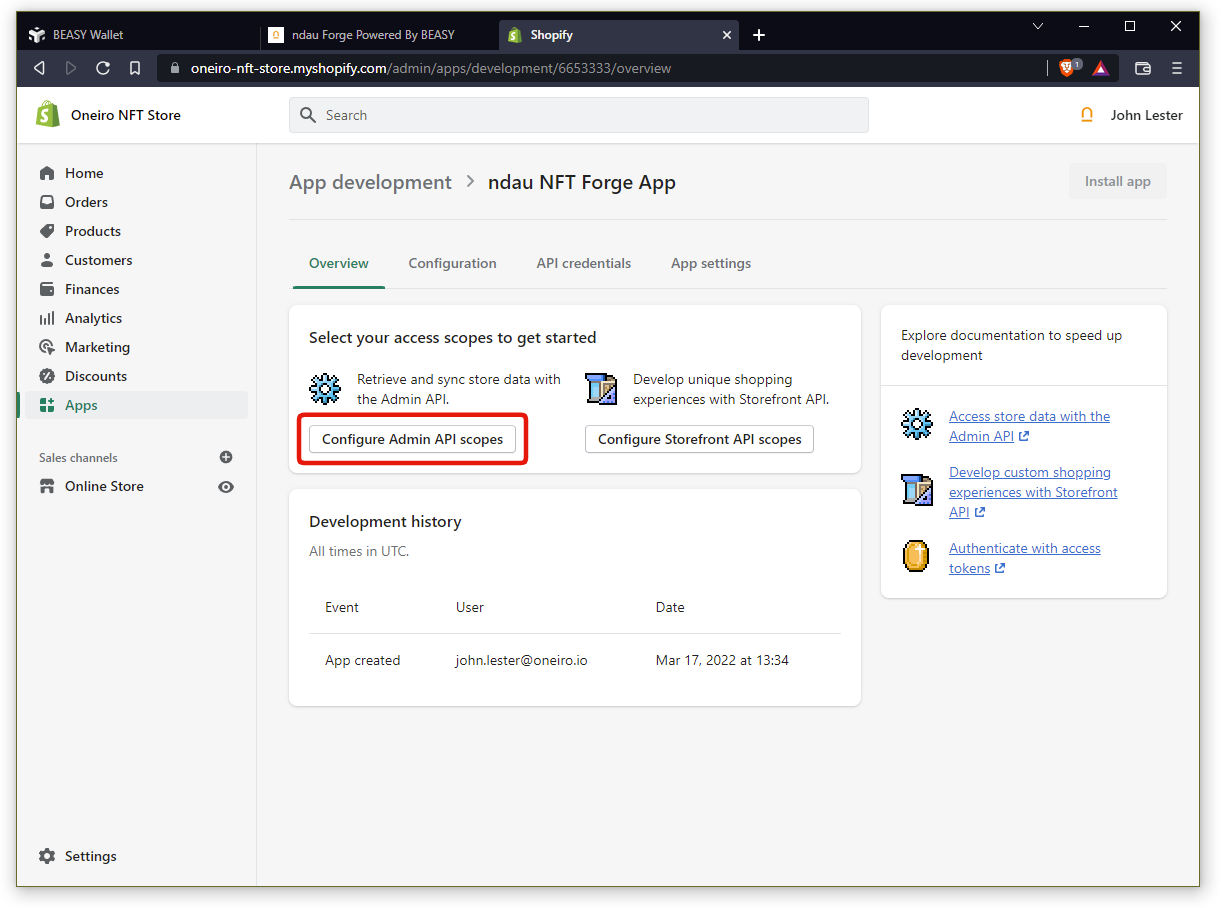
Click on the Configure Admin API scopes button.
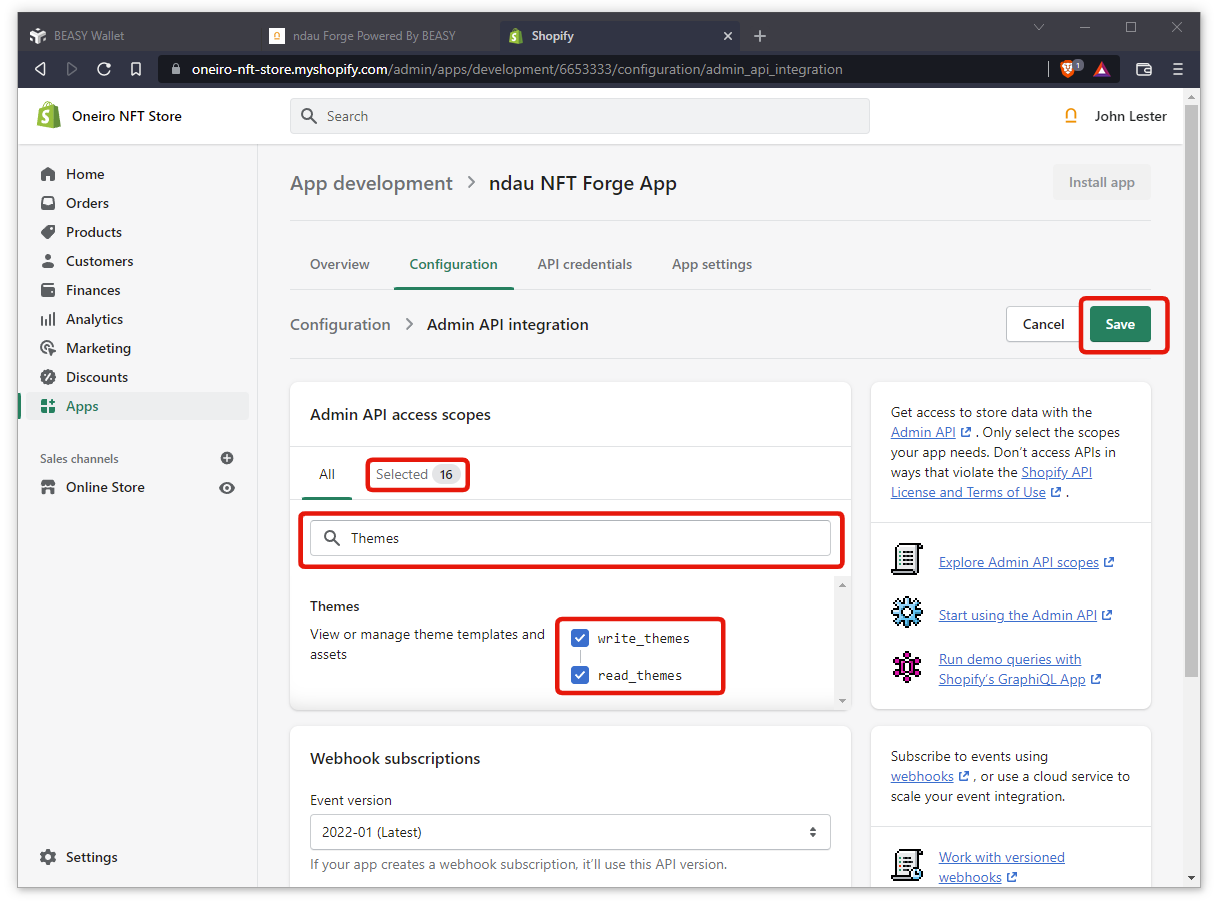
Use the Search box to pull up each of the following 8 Admin API Categories and enable both Read and Write for each of them:
- Draft Orders
- Fulfillment Services
- Inventory
- Order Editing
- Orders
- Products
- Script Tags
- Themes
When you are done, you will see 16 selected access scopes. Click the Save button to continue.
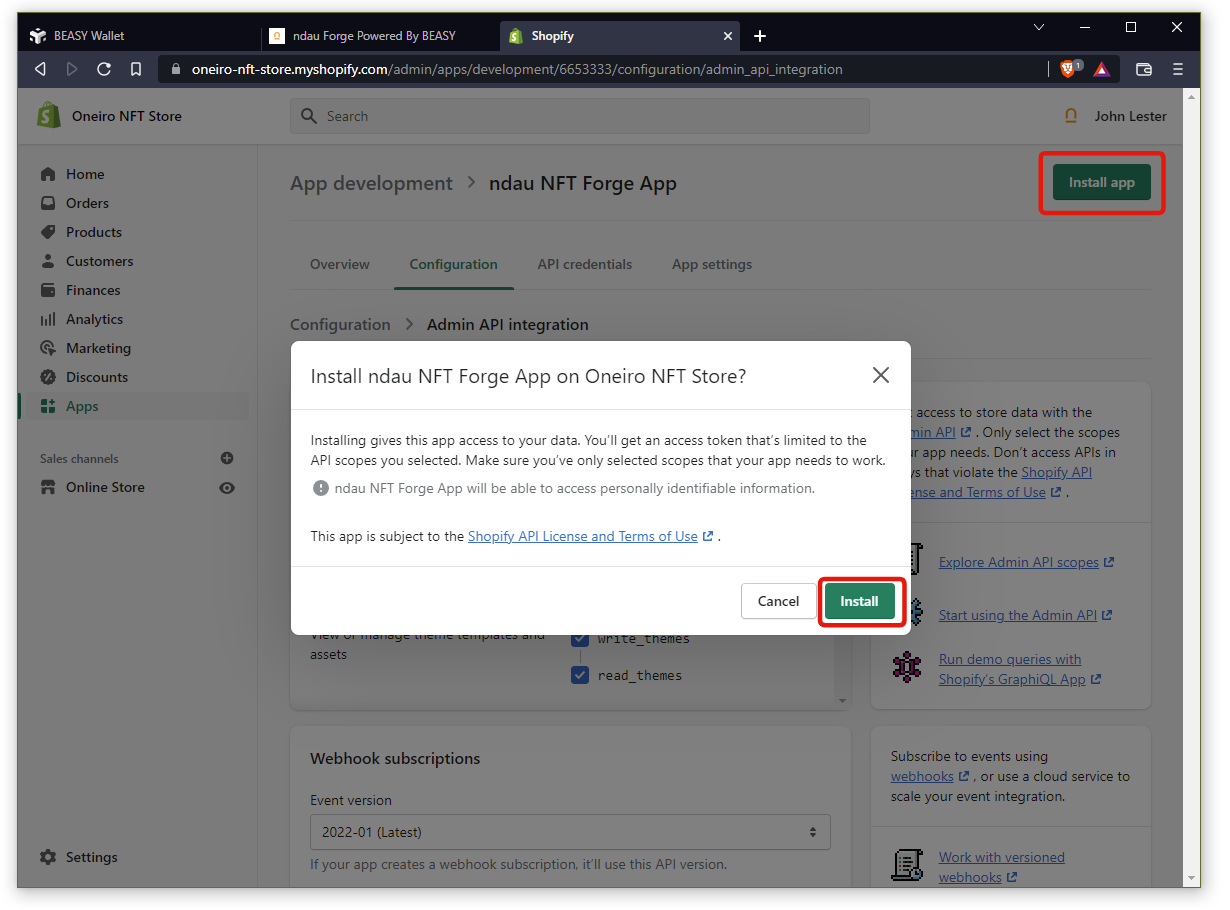
Click the Install app button and then click the Install button in the pop-up window.
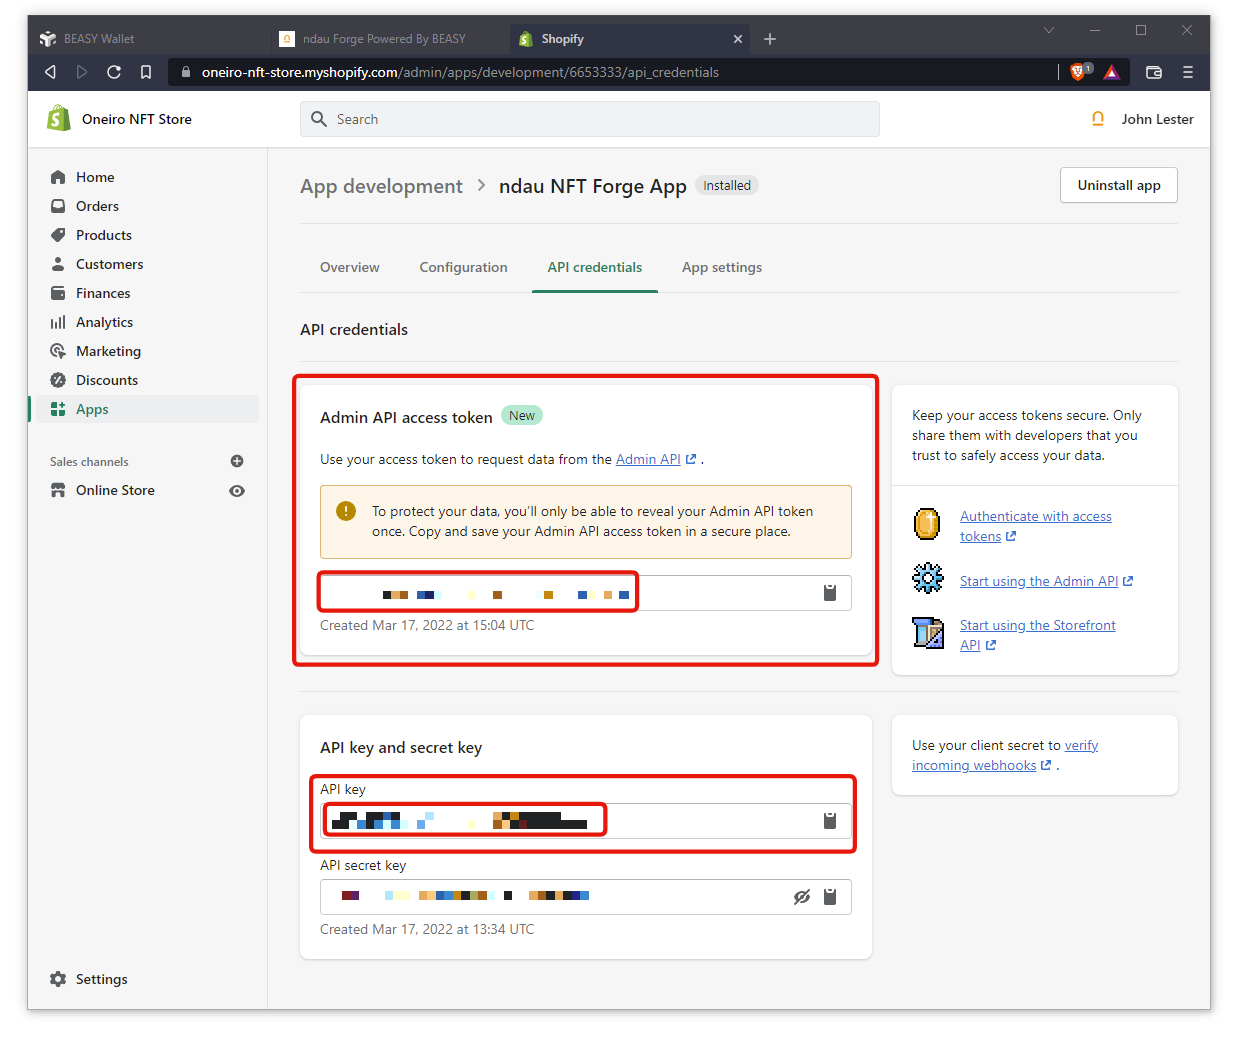
Copy these 2 pieces of information from your ndau NFT Forge App page and save them somewhere safe. You’re going to need them in the next step.
- Admin API access token
- API key
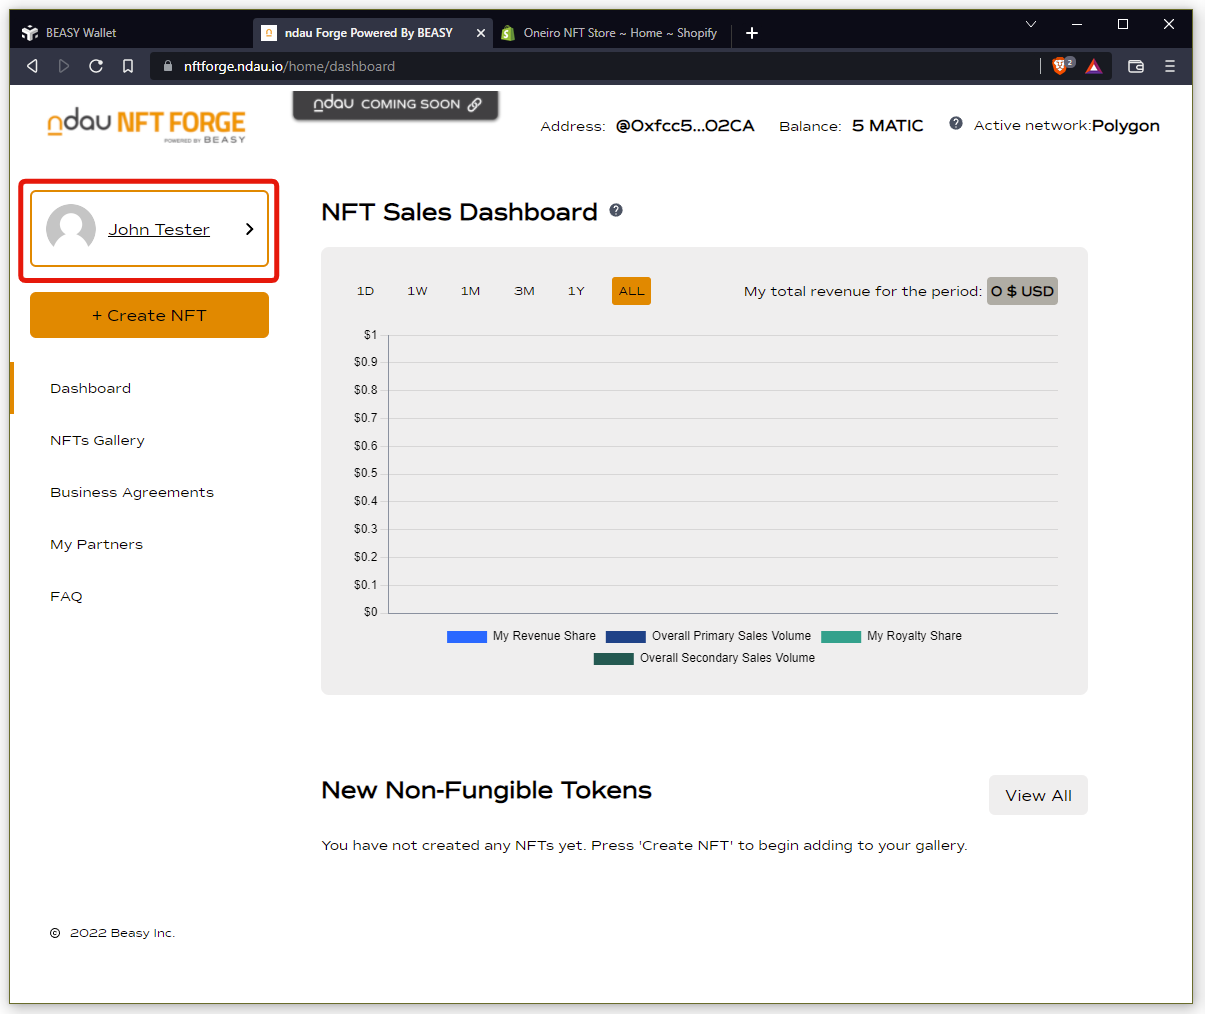
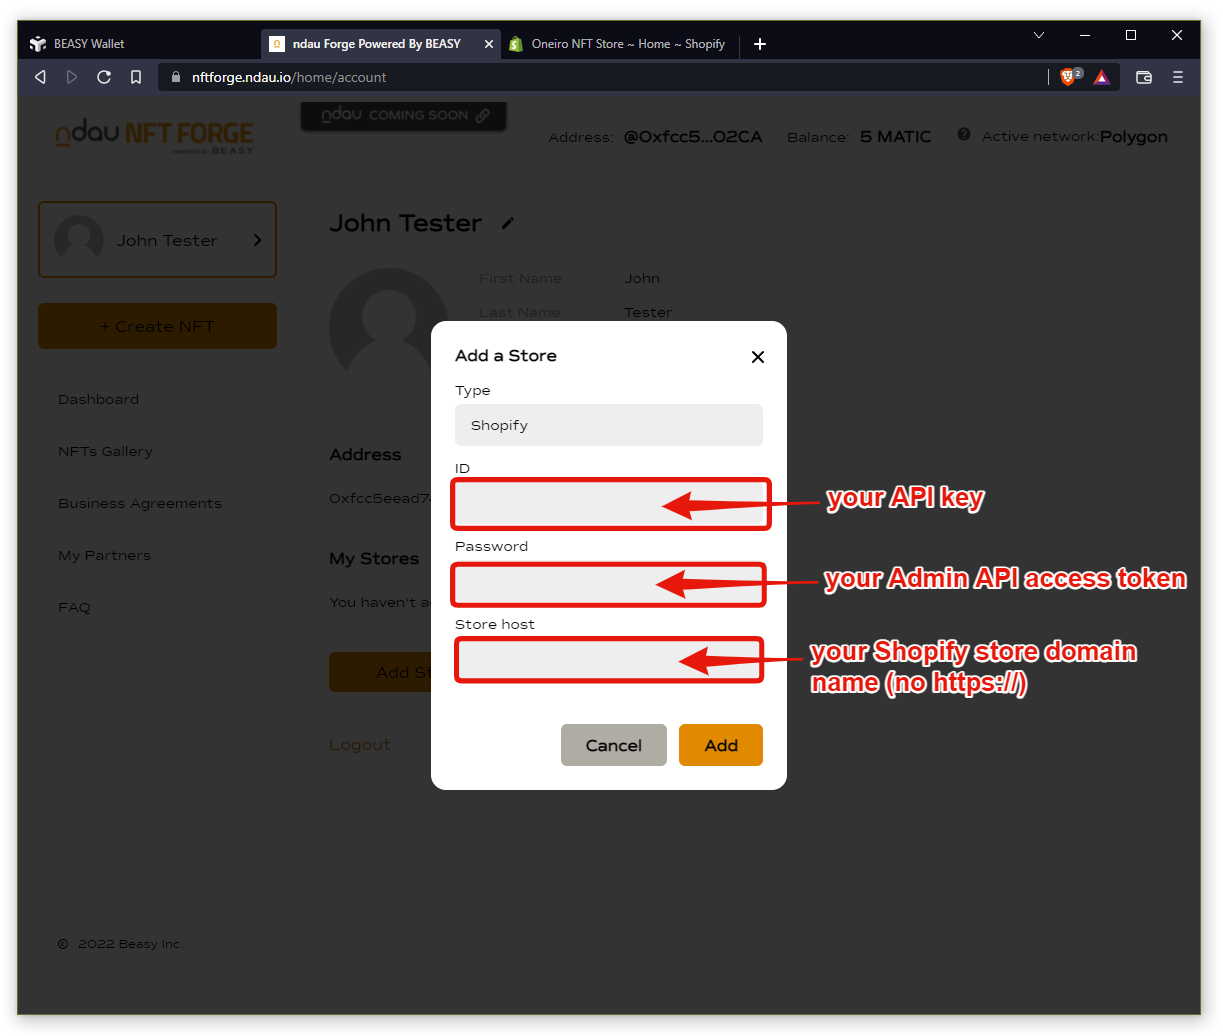
To complete the connection between your ndau NFT Forge and your Shopify store, log in to your ndau NFT Forge and click on your account name.
Click on the Add Store button.
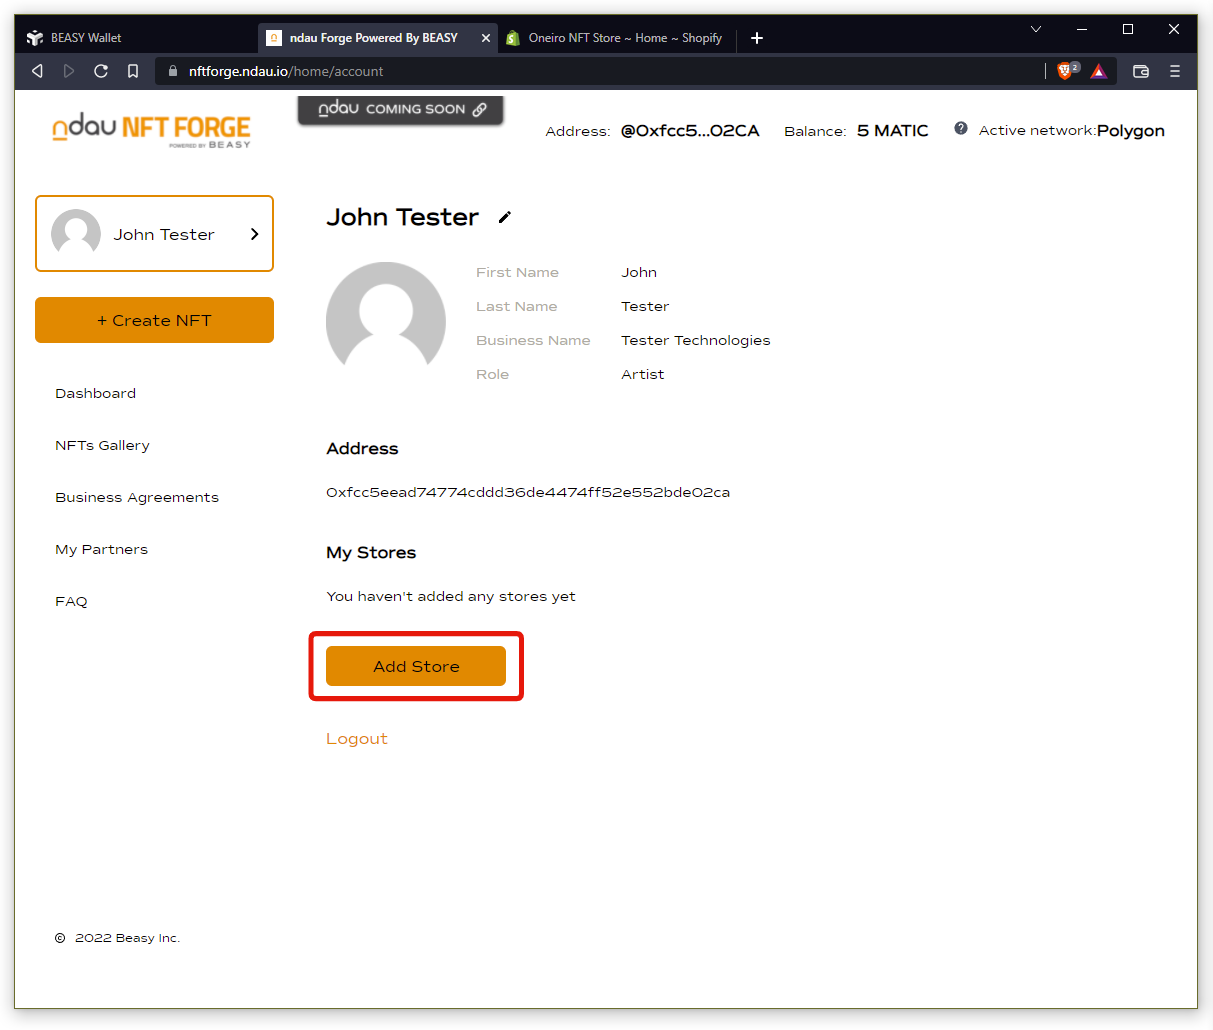
In the ID field, enter your API key.
In the Password field, enter your Admin API access token.
In the Store host field, enter your Shopify store’s domain name (no https://). For example, my store’s host field would be oneiro-nft-store.myshopify.com
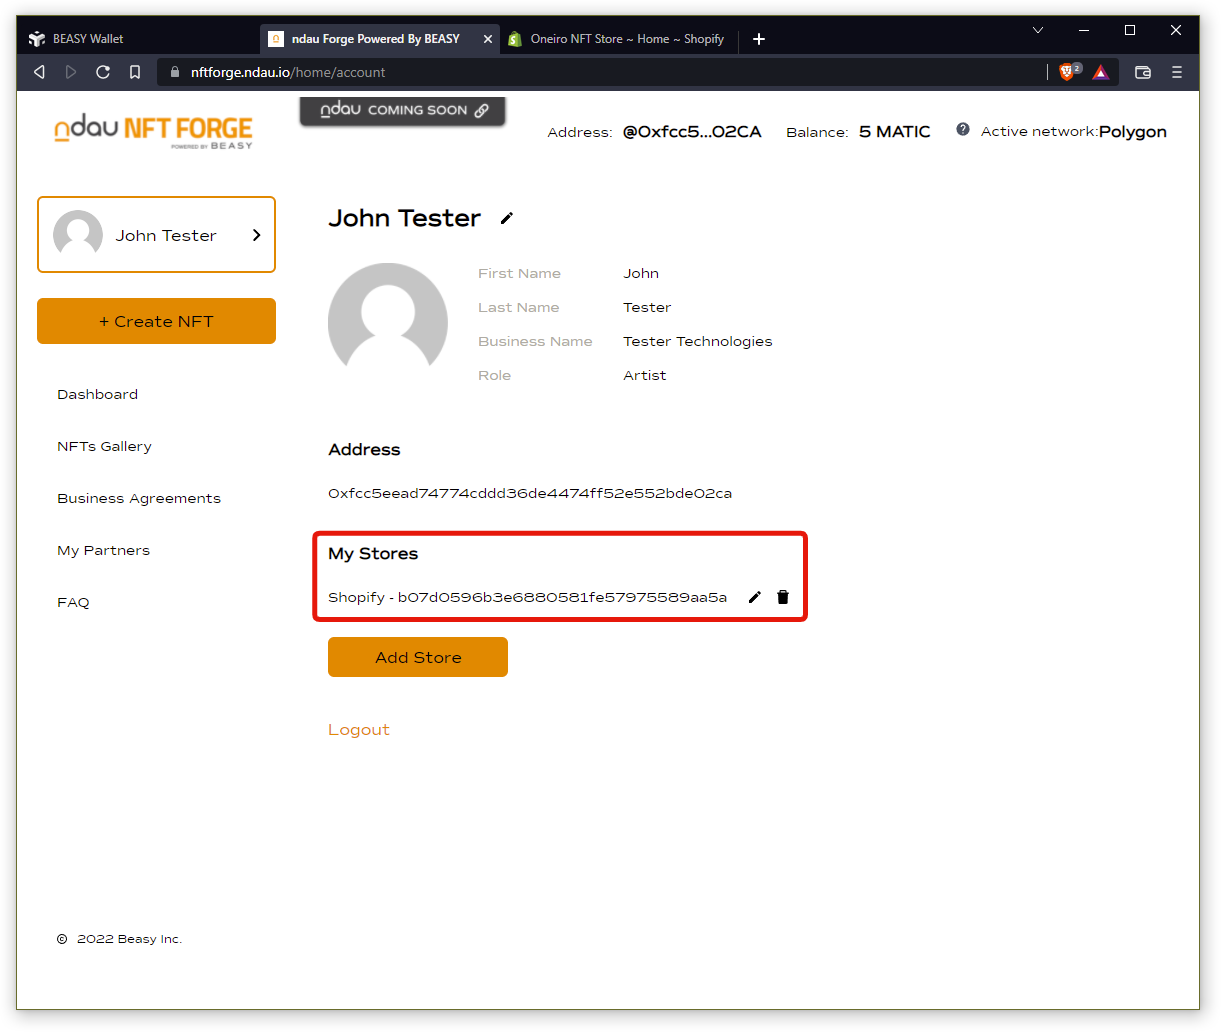
Congratulations, you’re done! You’ve successfully connected your Shopify store with your ndau NFT Forge.
You will now always see your Shopify store listed in your ndau NFT Forge profile page, identified by your API key.
[ Proceed to Step 6: Create your first NFT in the ndau NFT Forge ]