[ Return to Index: Getting Started with the ndau NFT Forge ]
[ Back Up to Step 5: Connect your ndau NFT Forge with your Shopify store ]
NFT Forge – Step 6: Create your first NFT in the ndau NFT Forge
Now you’re ready to create your first NFT! On your ndau NFT Forge you will see your available balance of MATIC in the upper part of the screen. Now that you have some MATIC available to spend on minting, click on the Create NFT button.
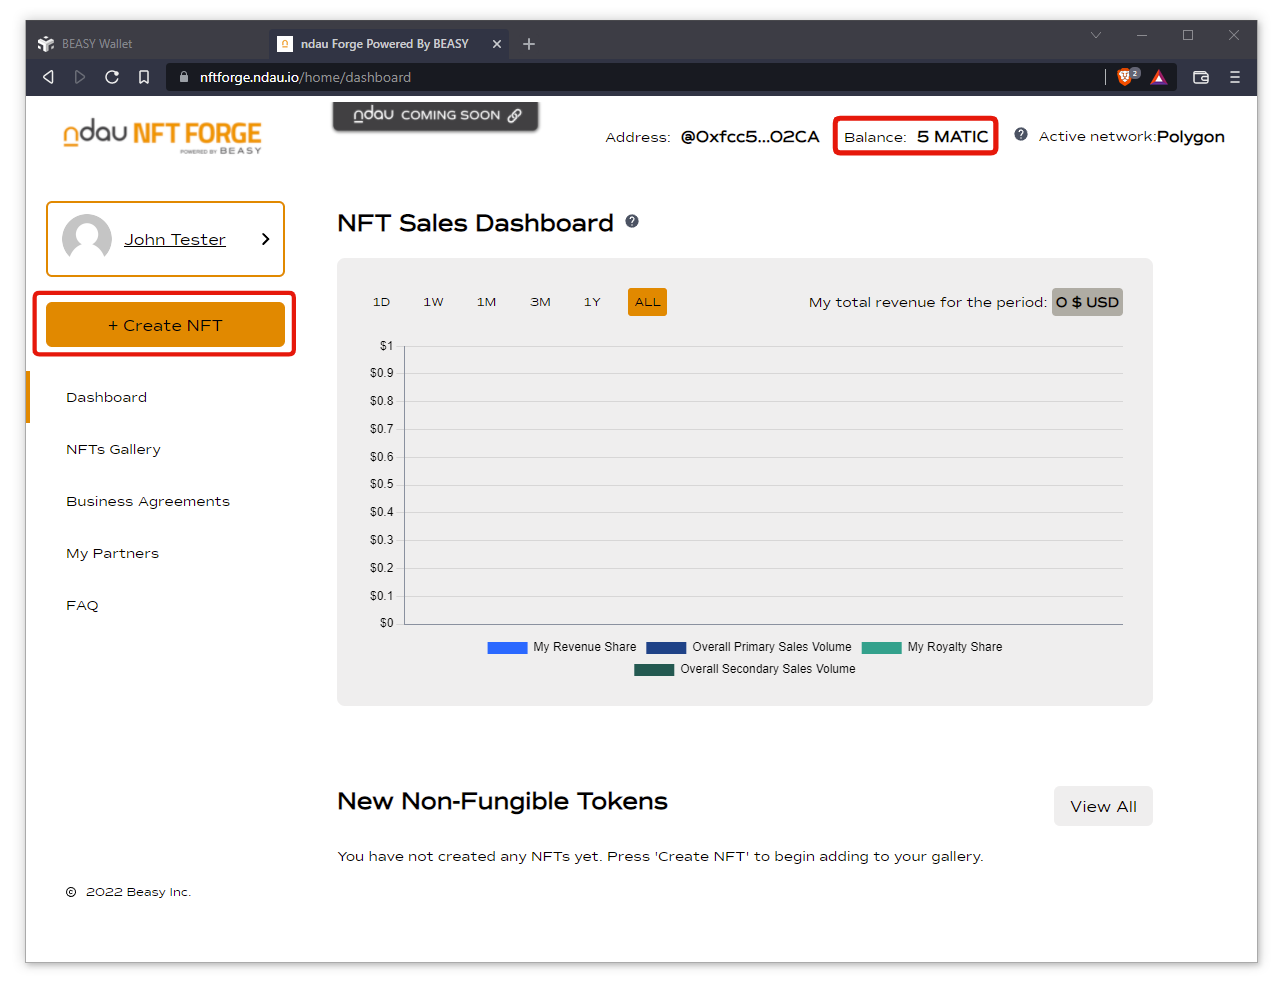
In this initial release of the ndau NFT Forge, we’re just going to be using MATIC to pay for minting fees.
But next month we’ll be adding the ability to also use ndau to pay for minting fees as well as the ability to receive royalty payments in ndau. This will open up a new earning opportunity for content creators as you’ll be able to watch your ndau royalty payments compound and grow automatically in your ndau wallet app!
For now, let’s mint a single NFT using MATIC. Click the Continue button to proceed.
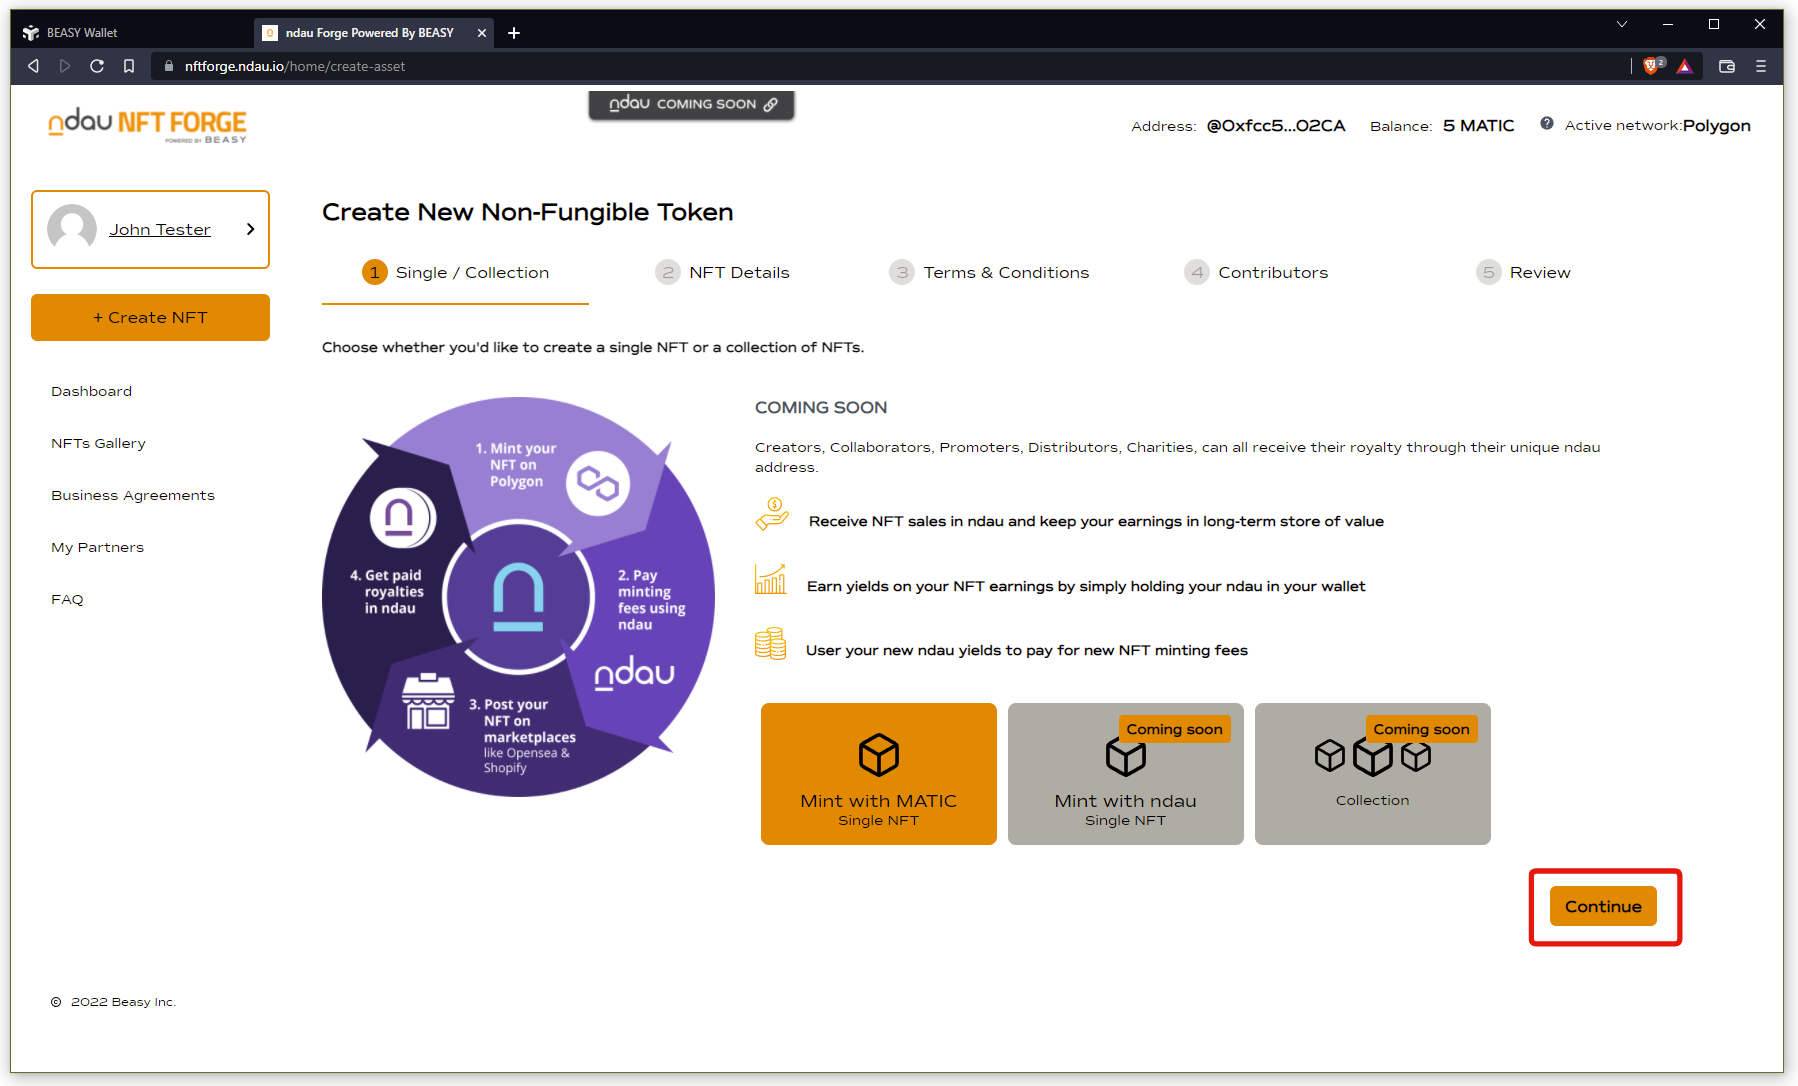
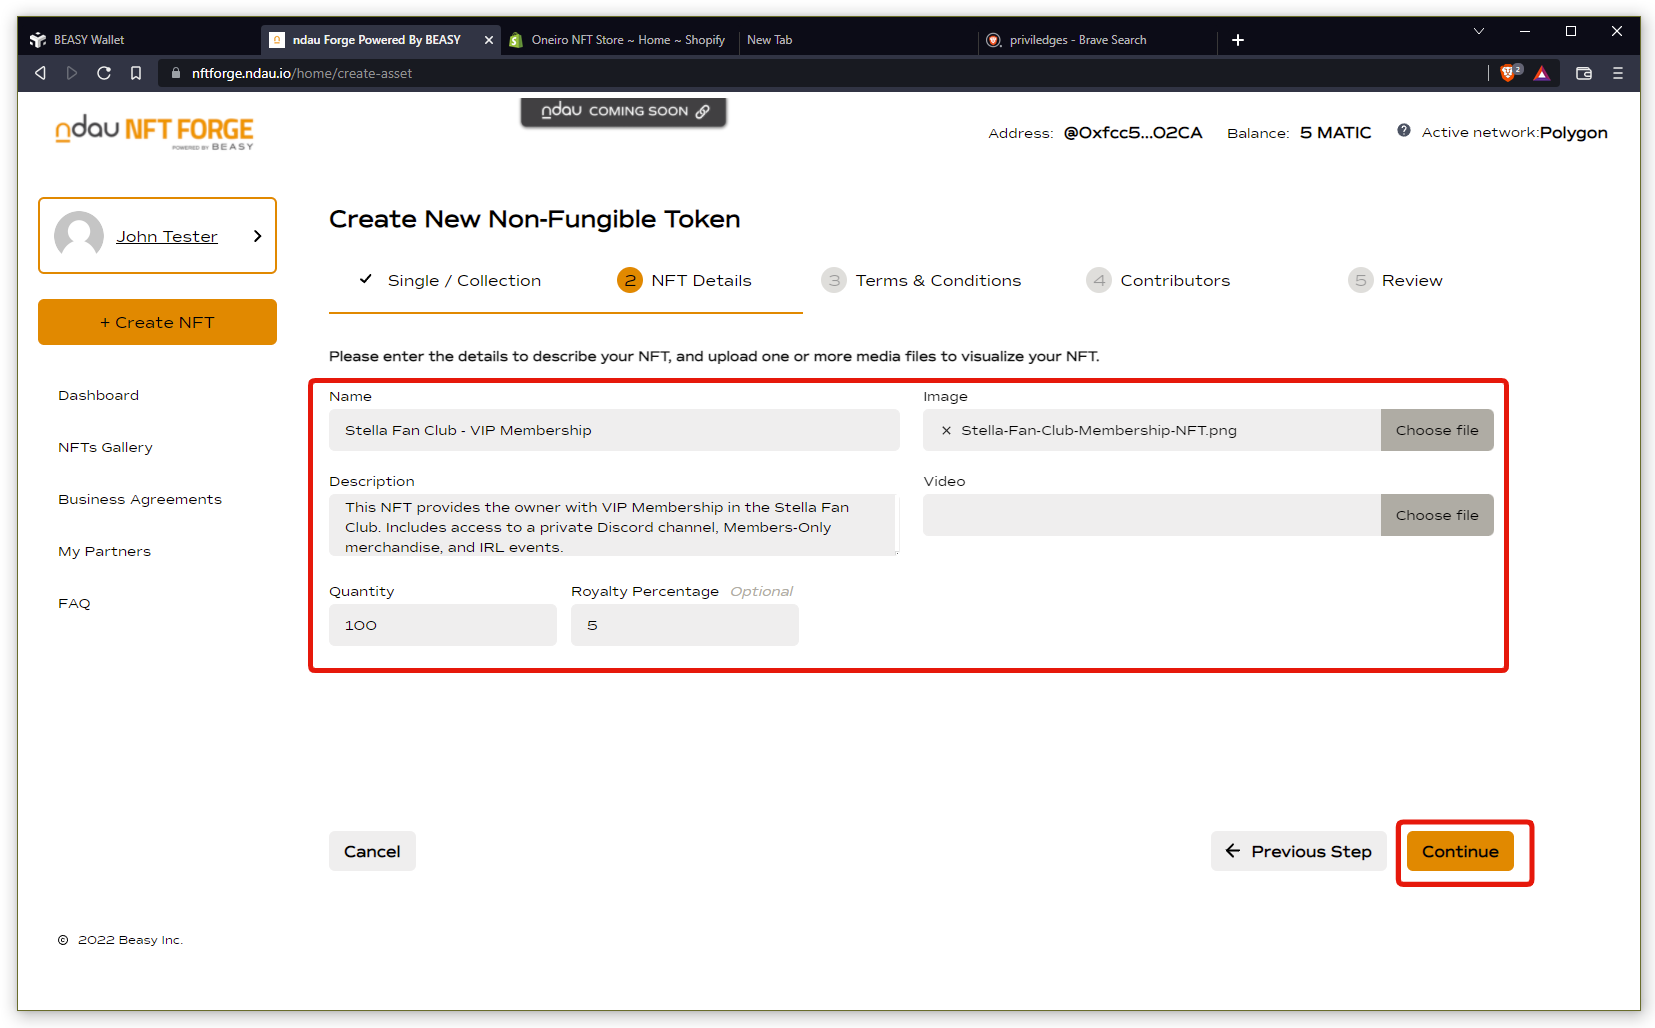
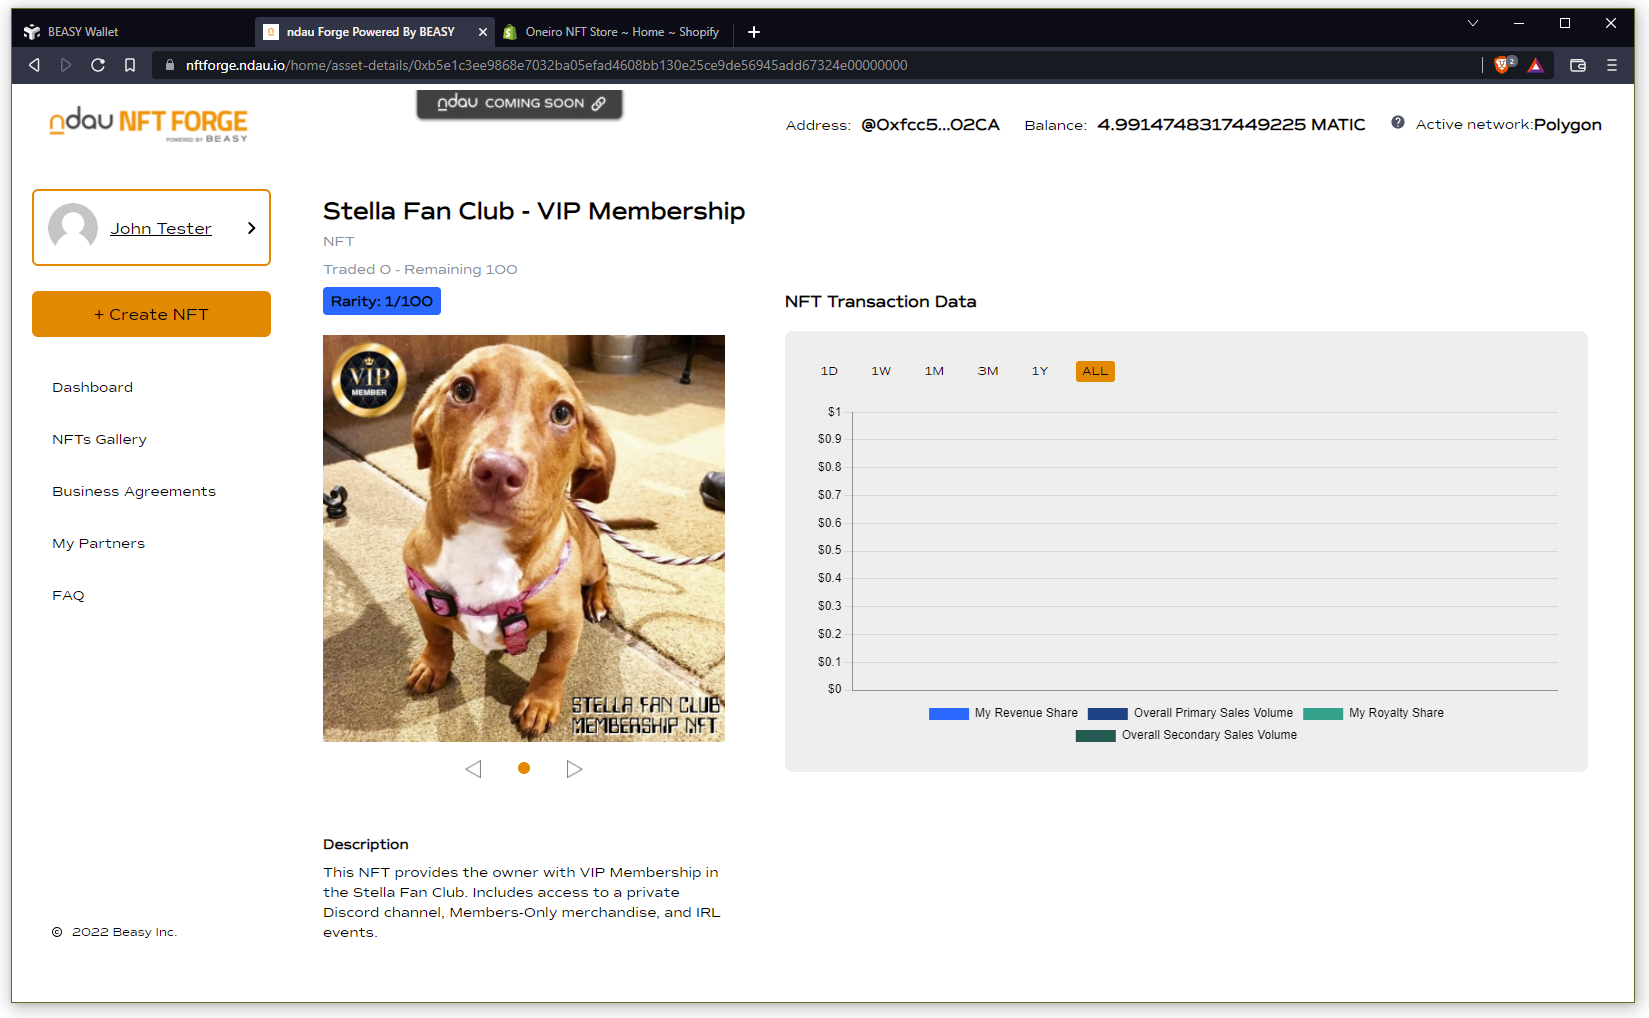
Enter some details to describe your NFT and upload one or more media files. In this example I’m uploading a single image, setting the quantity to 100 copies, and reserving a royalty payment to myself of 5% on all secondary market sales. Click the Continue button to move on.
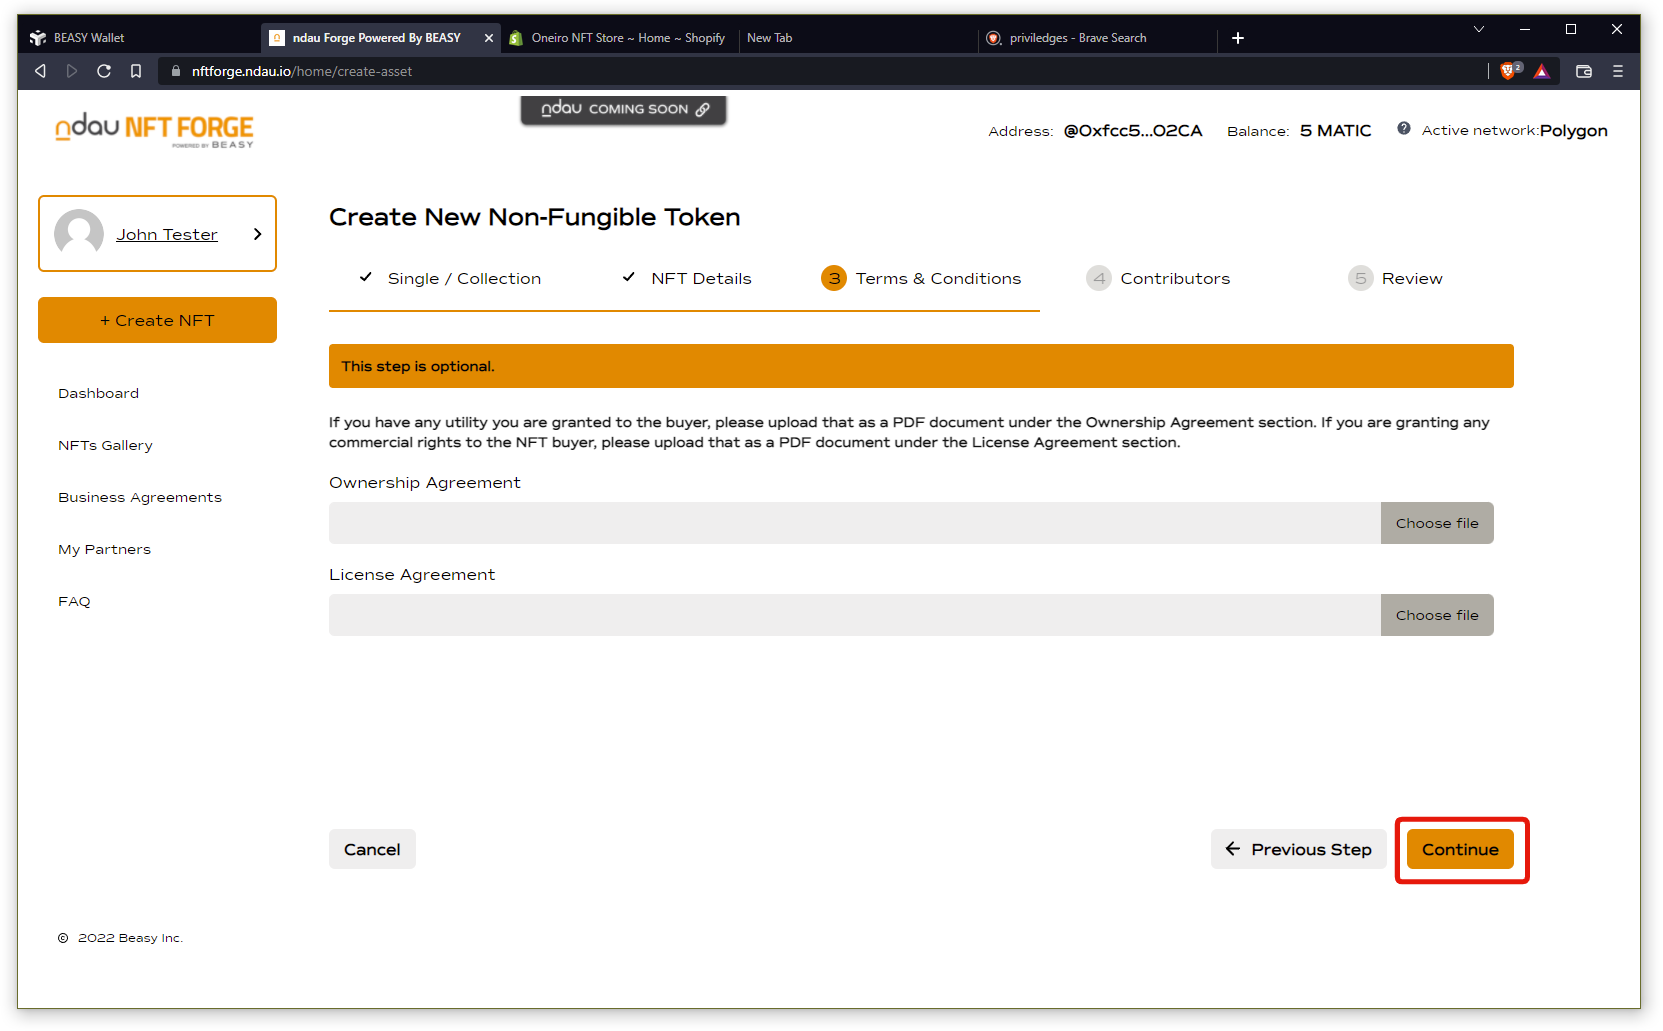
In the Terms and Conditions section, you can optionally upload an Ownership Agreement and License Agreement associated with this NFT asset.
These documents (typically PDF or MS Word) will enable you to legally govern how your NFT can be utilized from a commercial standpoint as well as from a utility holder’s perspective.
In this example I’m going to skip uploading any documents. Click the Continue button to move on.
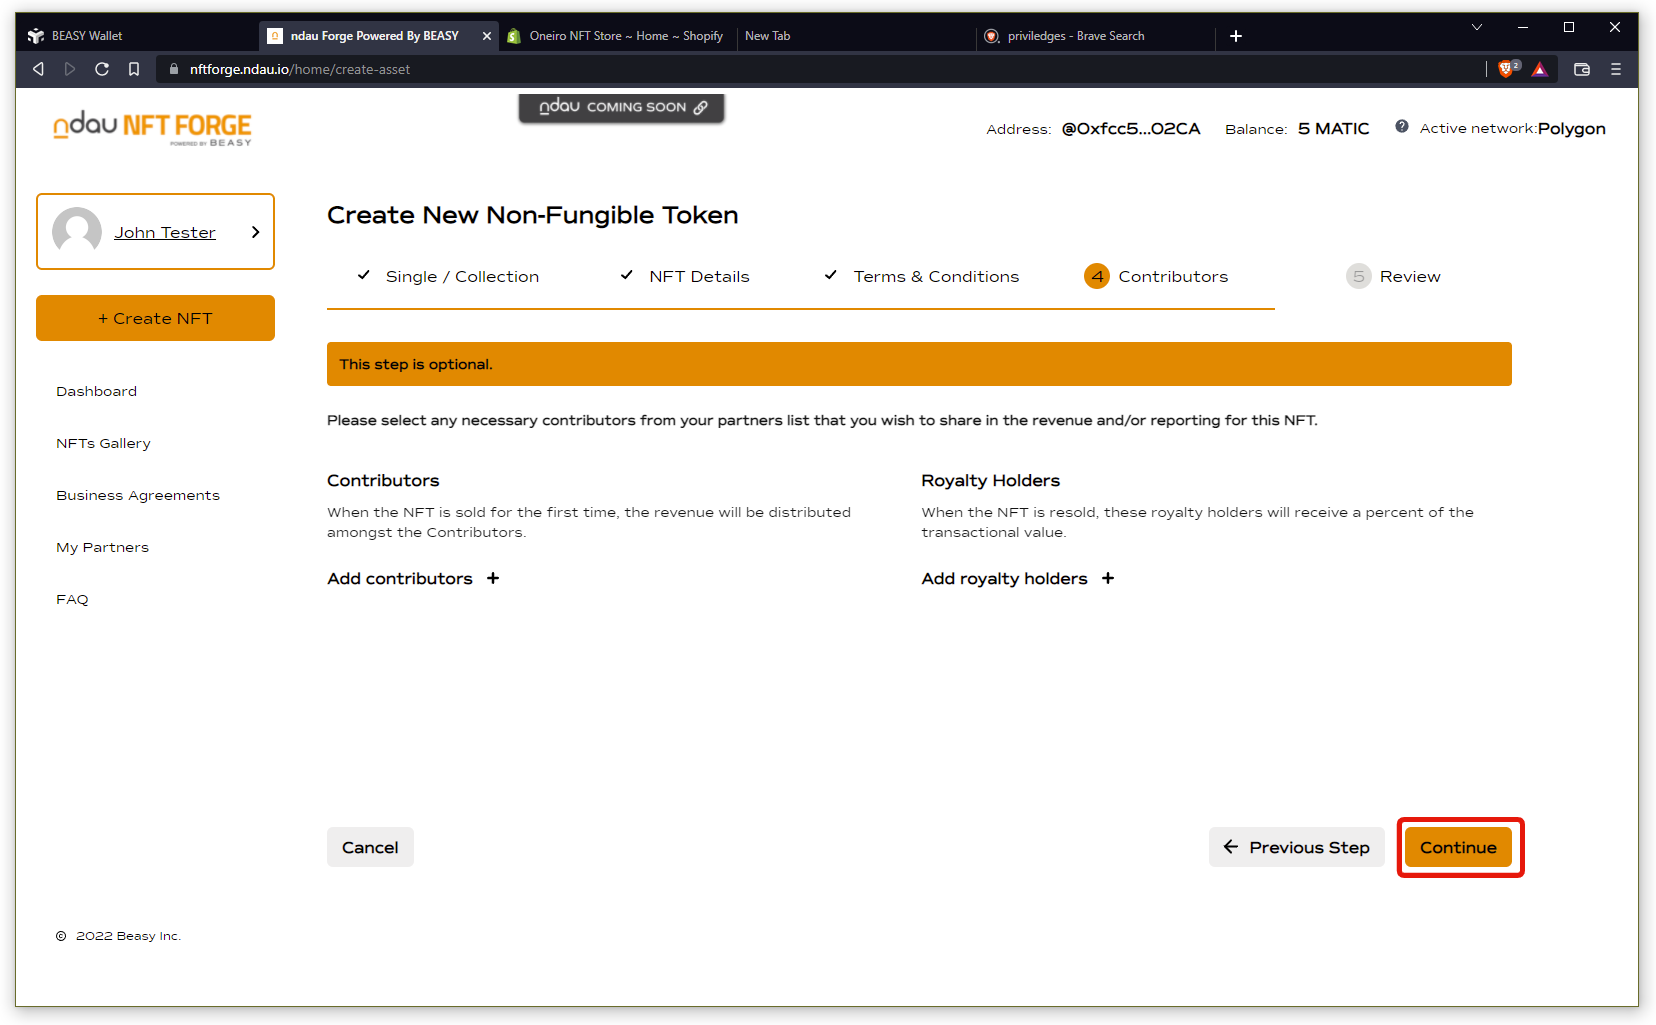
This next step is to add any contributors to this NFT. Contributors will be allocated revenue from a primary market sale, and you also can add a Royalty holder who will receive revenue allocations from a secondary market sale. Royalties from secondary market sales will be transferred at point of sale directly into that royalty holder’s BEASY wallet.
In this example I’m going to skip adding any contributors. Click the Continue button to move on.
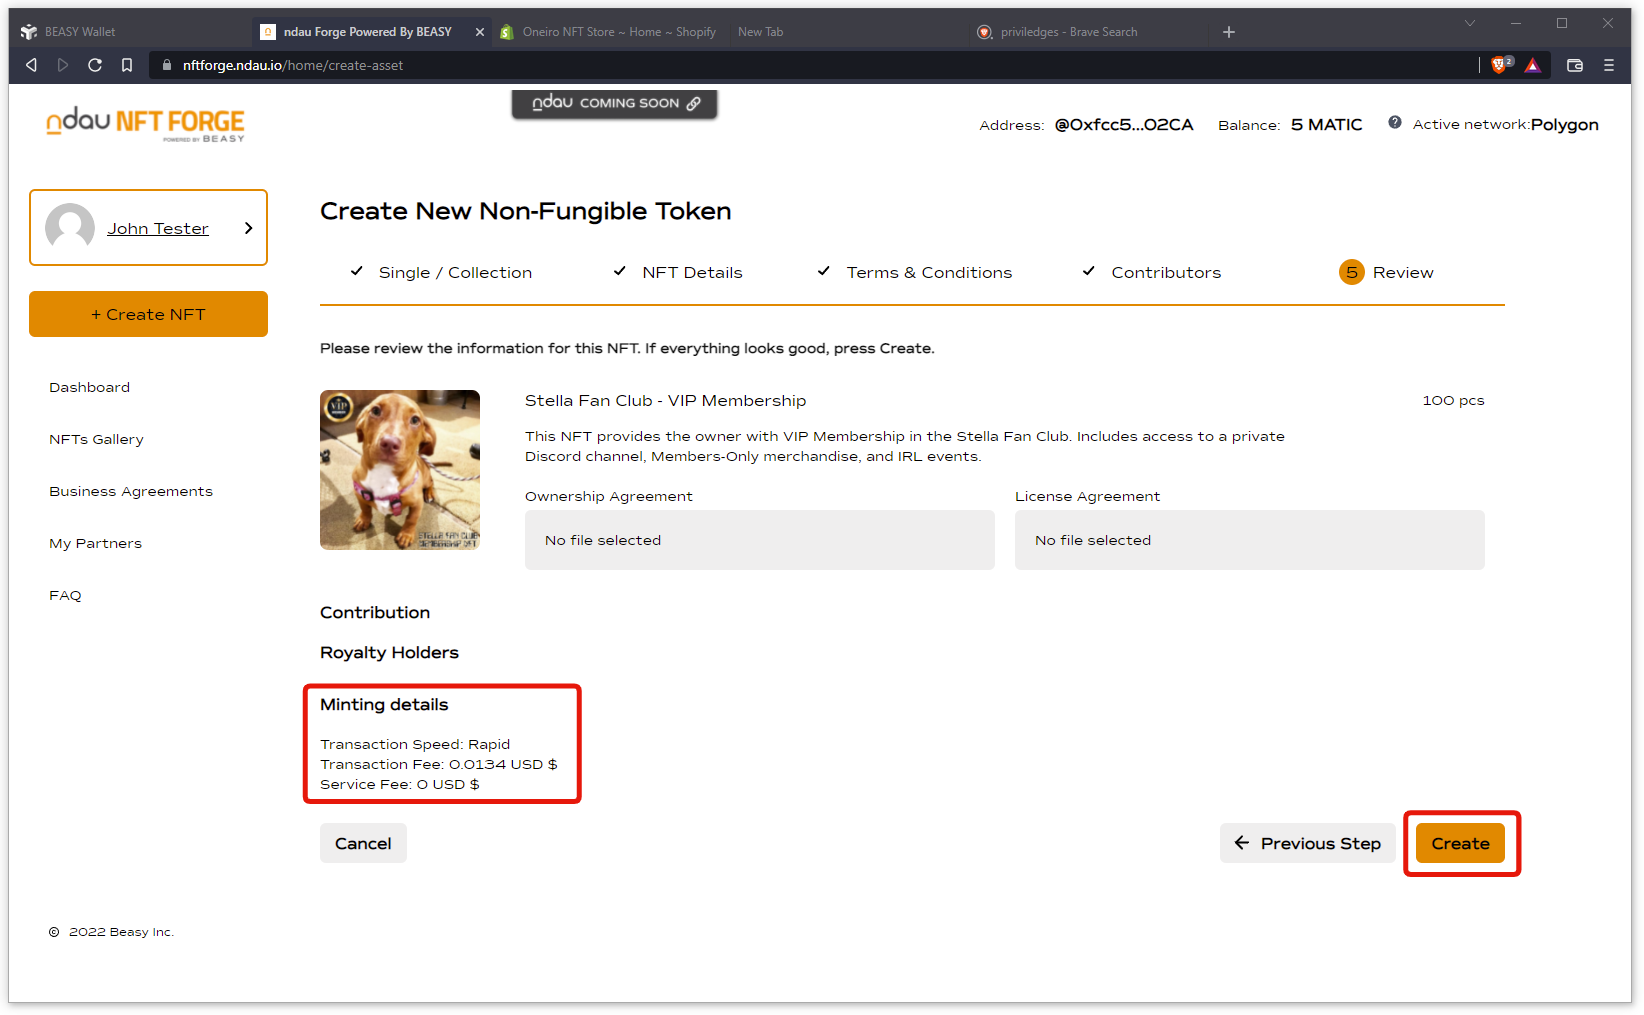
On this last page your Forge will calculate the transaction cost to mint your NFT and allow you to review everything you’ve entered.
Once you’ve confirmed all your information, click the Create button to continue.
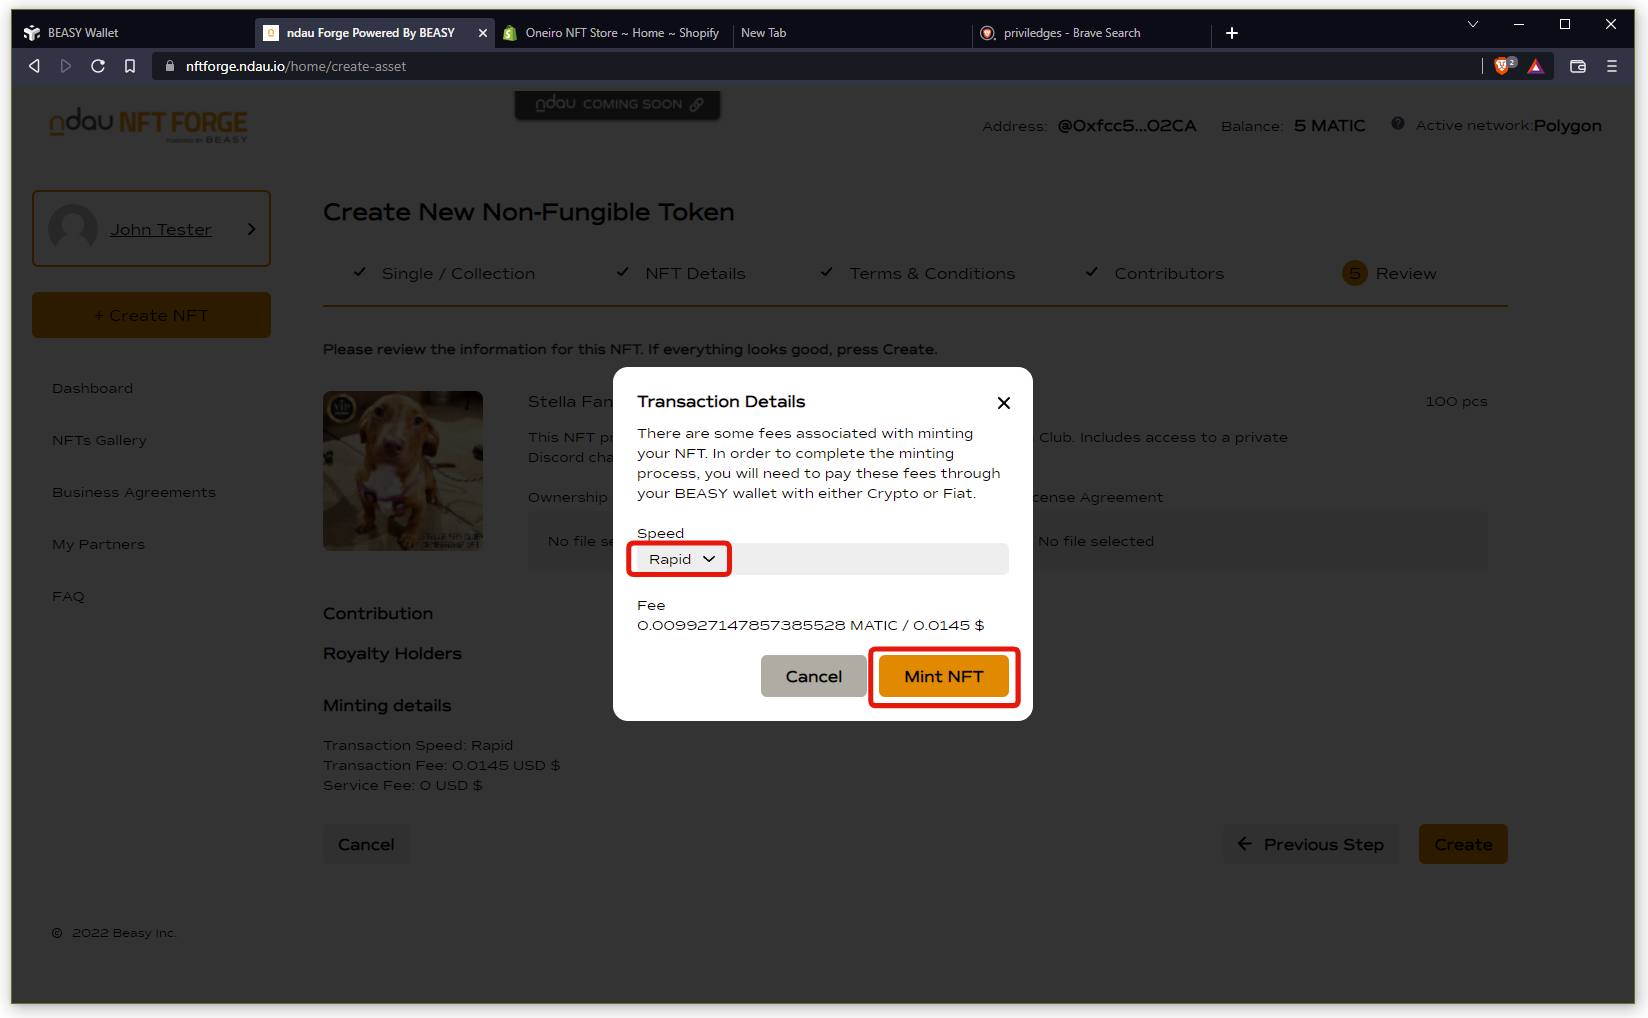
You have the option to select the speed to mint your transaction. We recommend you use the default “Rapid” option.
Click the Mint NFT button when you’re ready.
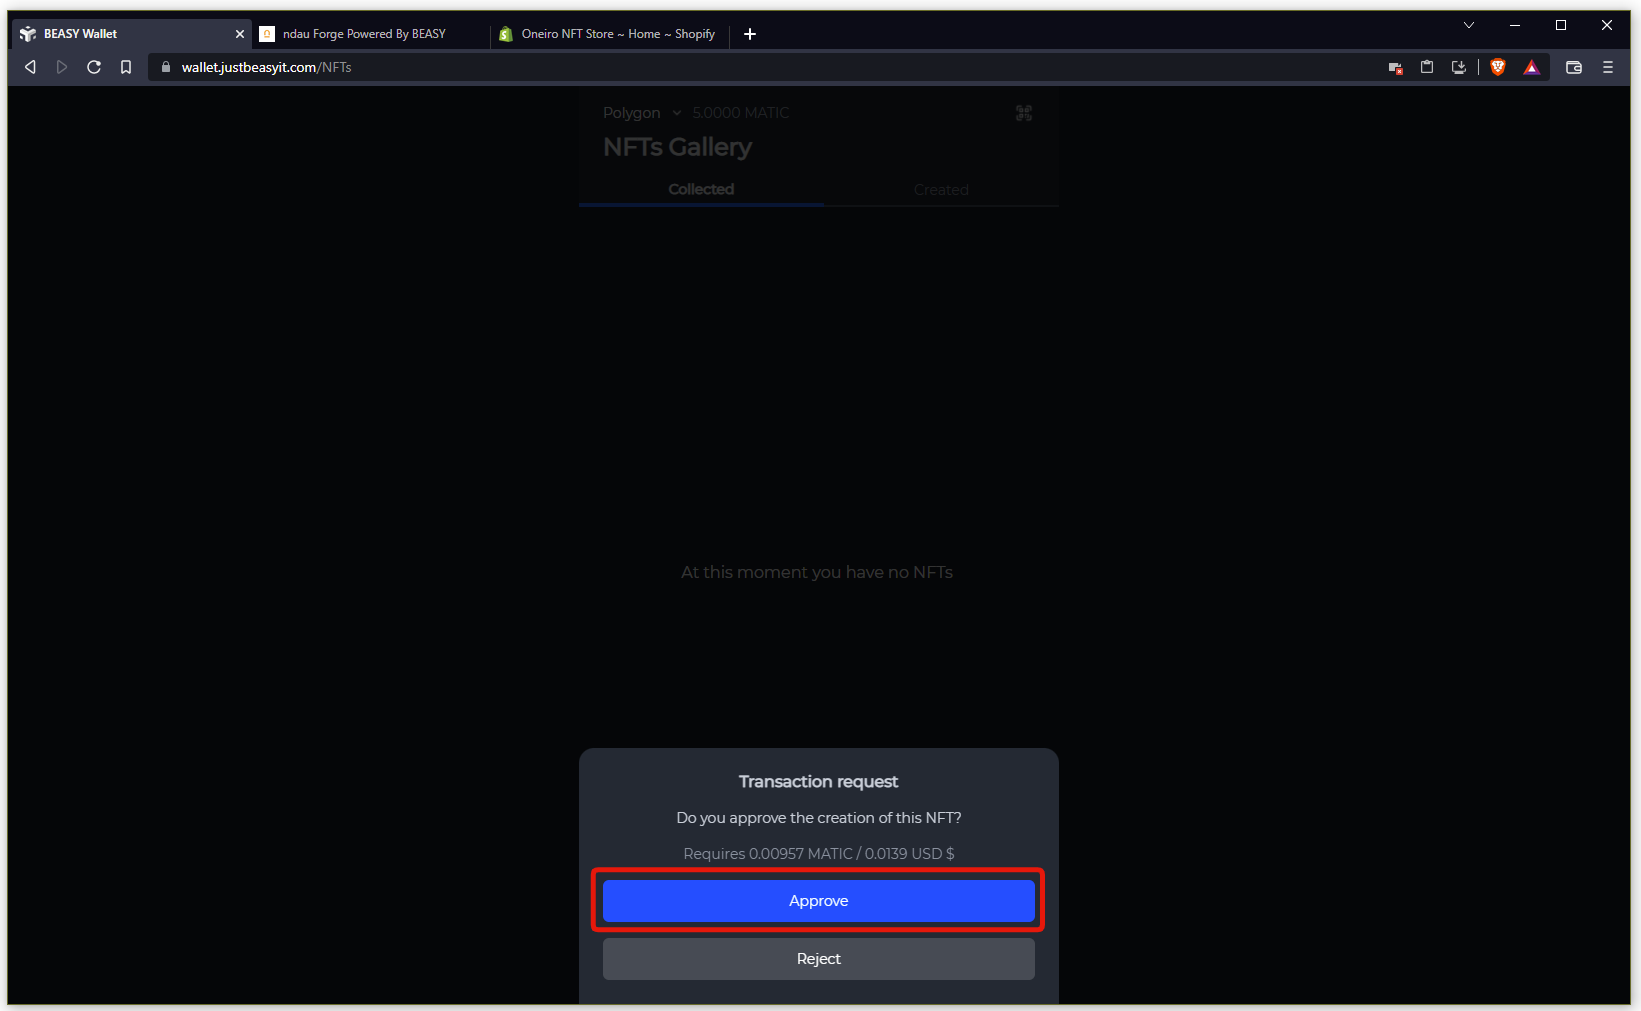
You will now see Transaction Request pop up in your BEASY Wallet. Click the Approve button to sign the transaction to create your NFT.
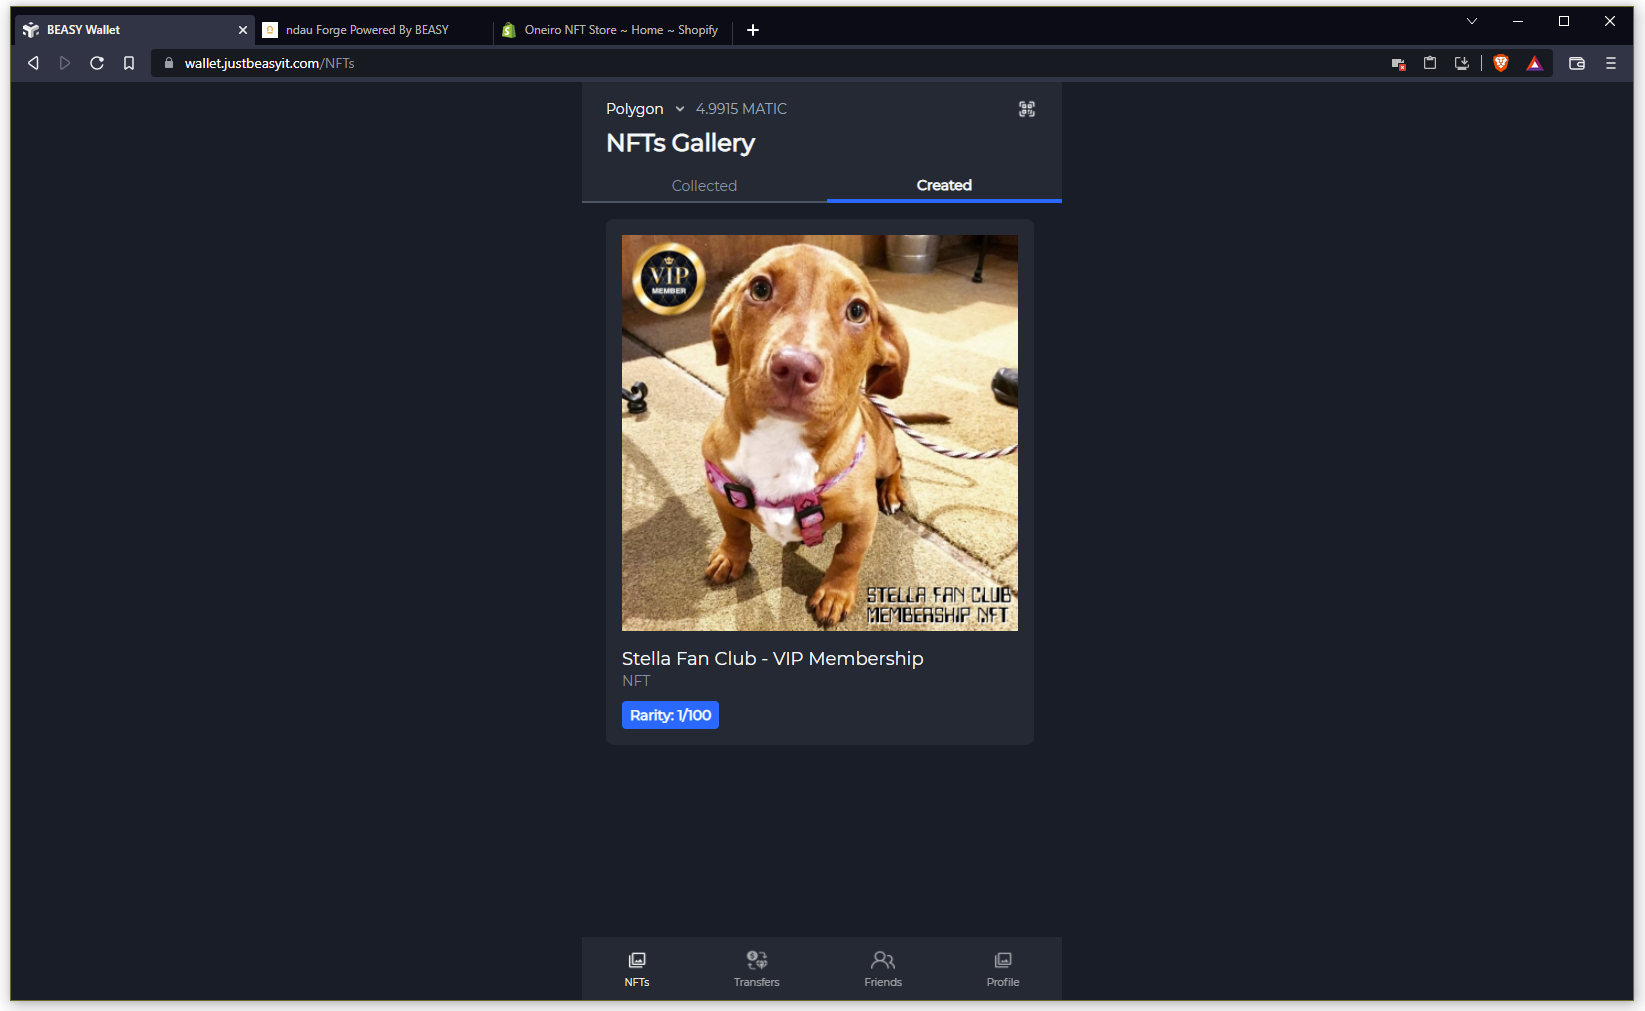
CONGRATULATIONS! Your NFT has been created!
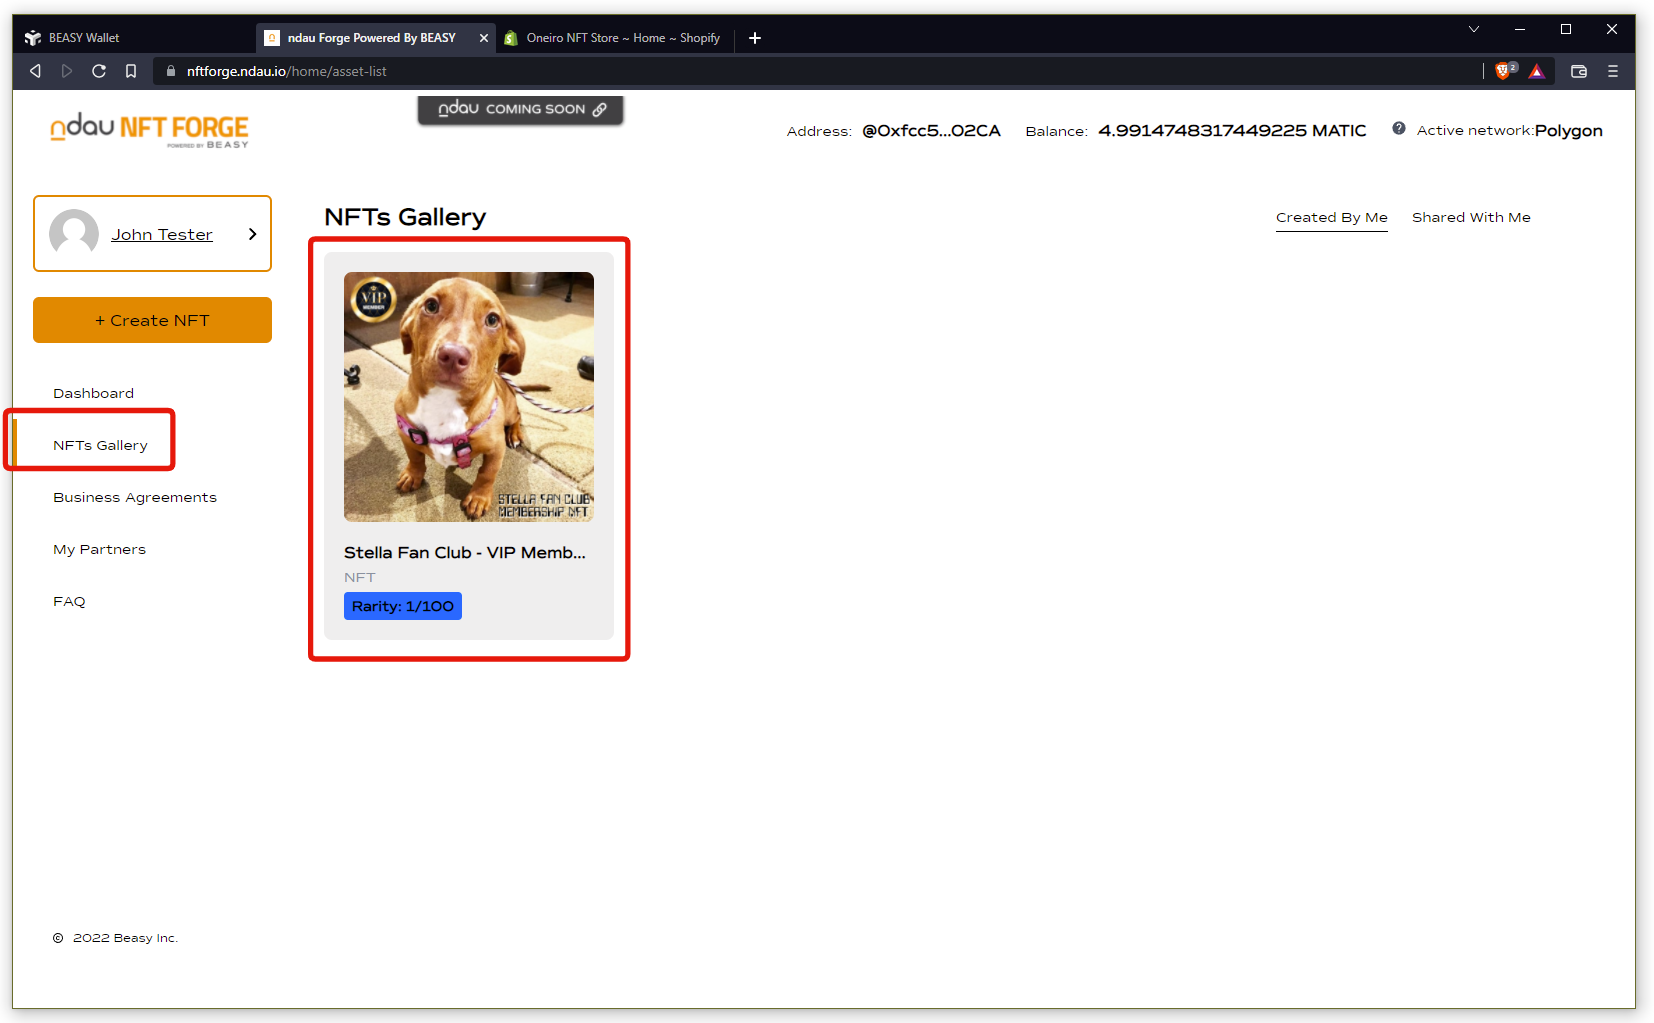
You can now see it in your BEASY Wallet and your ndau NFT Forge.
[ Proceed to Step 7: Listing your NFT for sale on Shopify and OpenSea ]