[ Return to Index: Getting Started with the ndau NFT Forge ]
[ Back Up to Step 6: Create your first NFT in the ndau NFT Forge ]
NFT Forge – Step 7: Listing your NFT for sale on Shopify
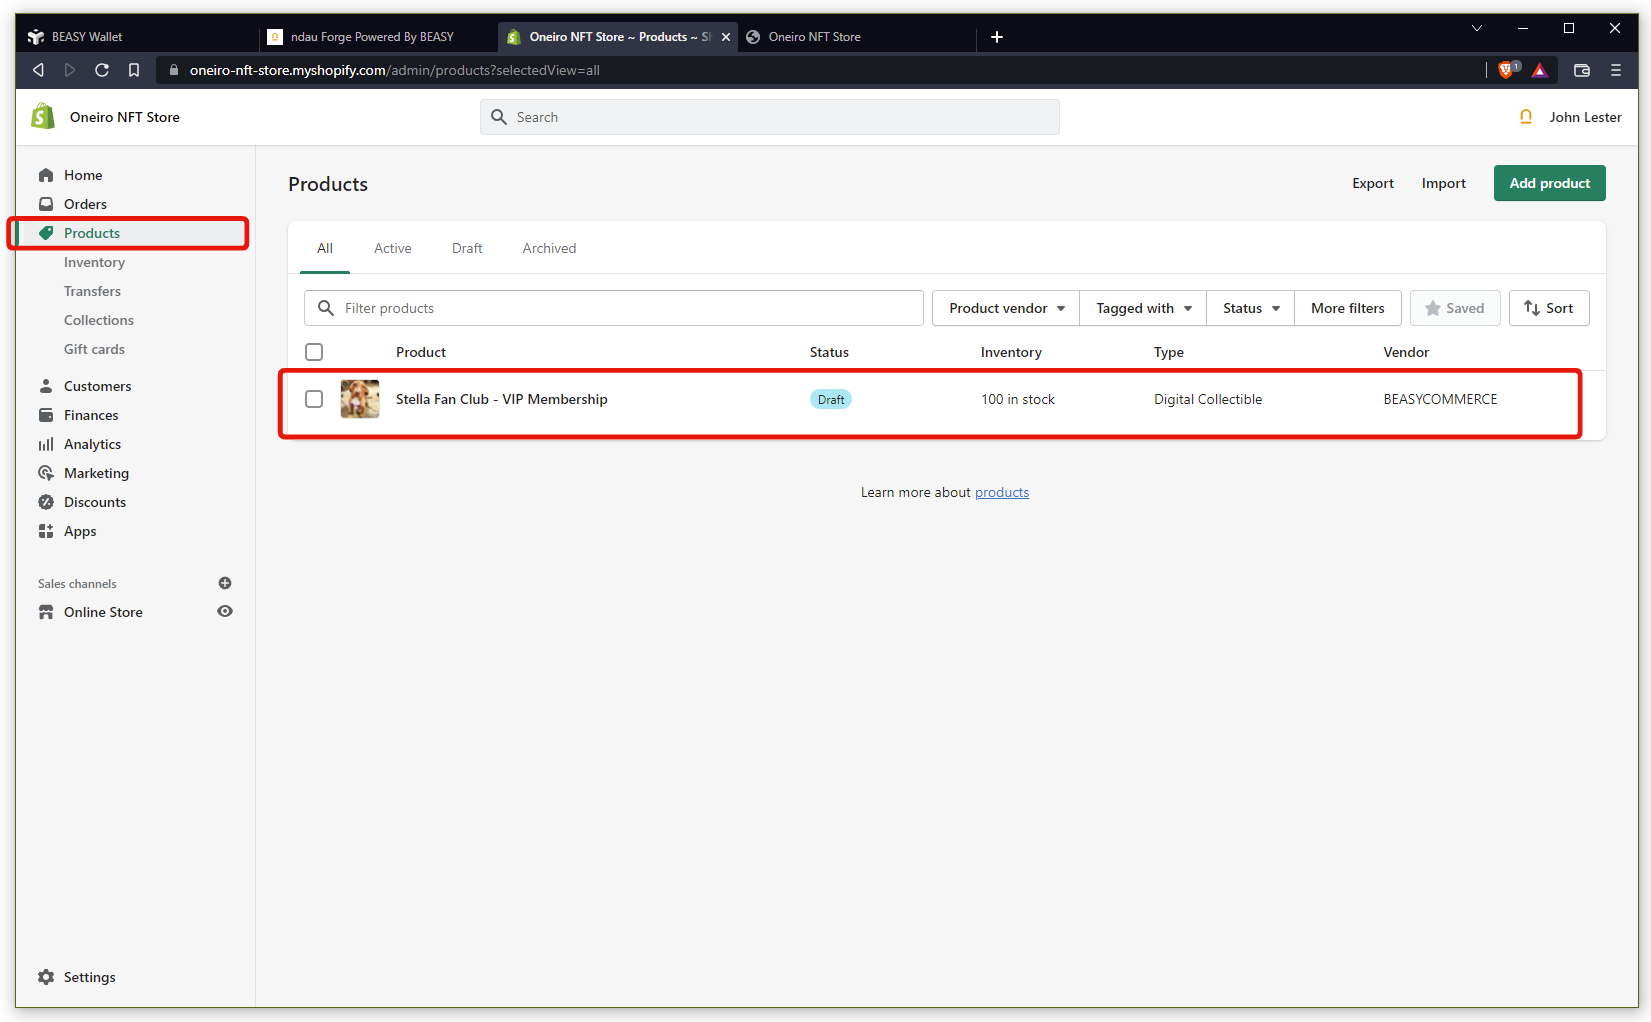
Back in Step 6, you connected your ndau NFT Forge with your Shopify store.
This means that any NFT you create from now on will automatically become available in the Products section of your Shopify store.
How awesomely convenient is that?
Click on your new NFT in your Shopify Products listing to open it up.

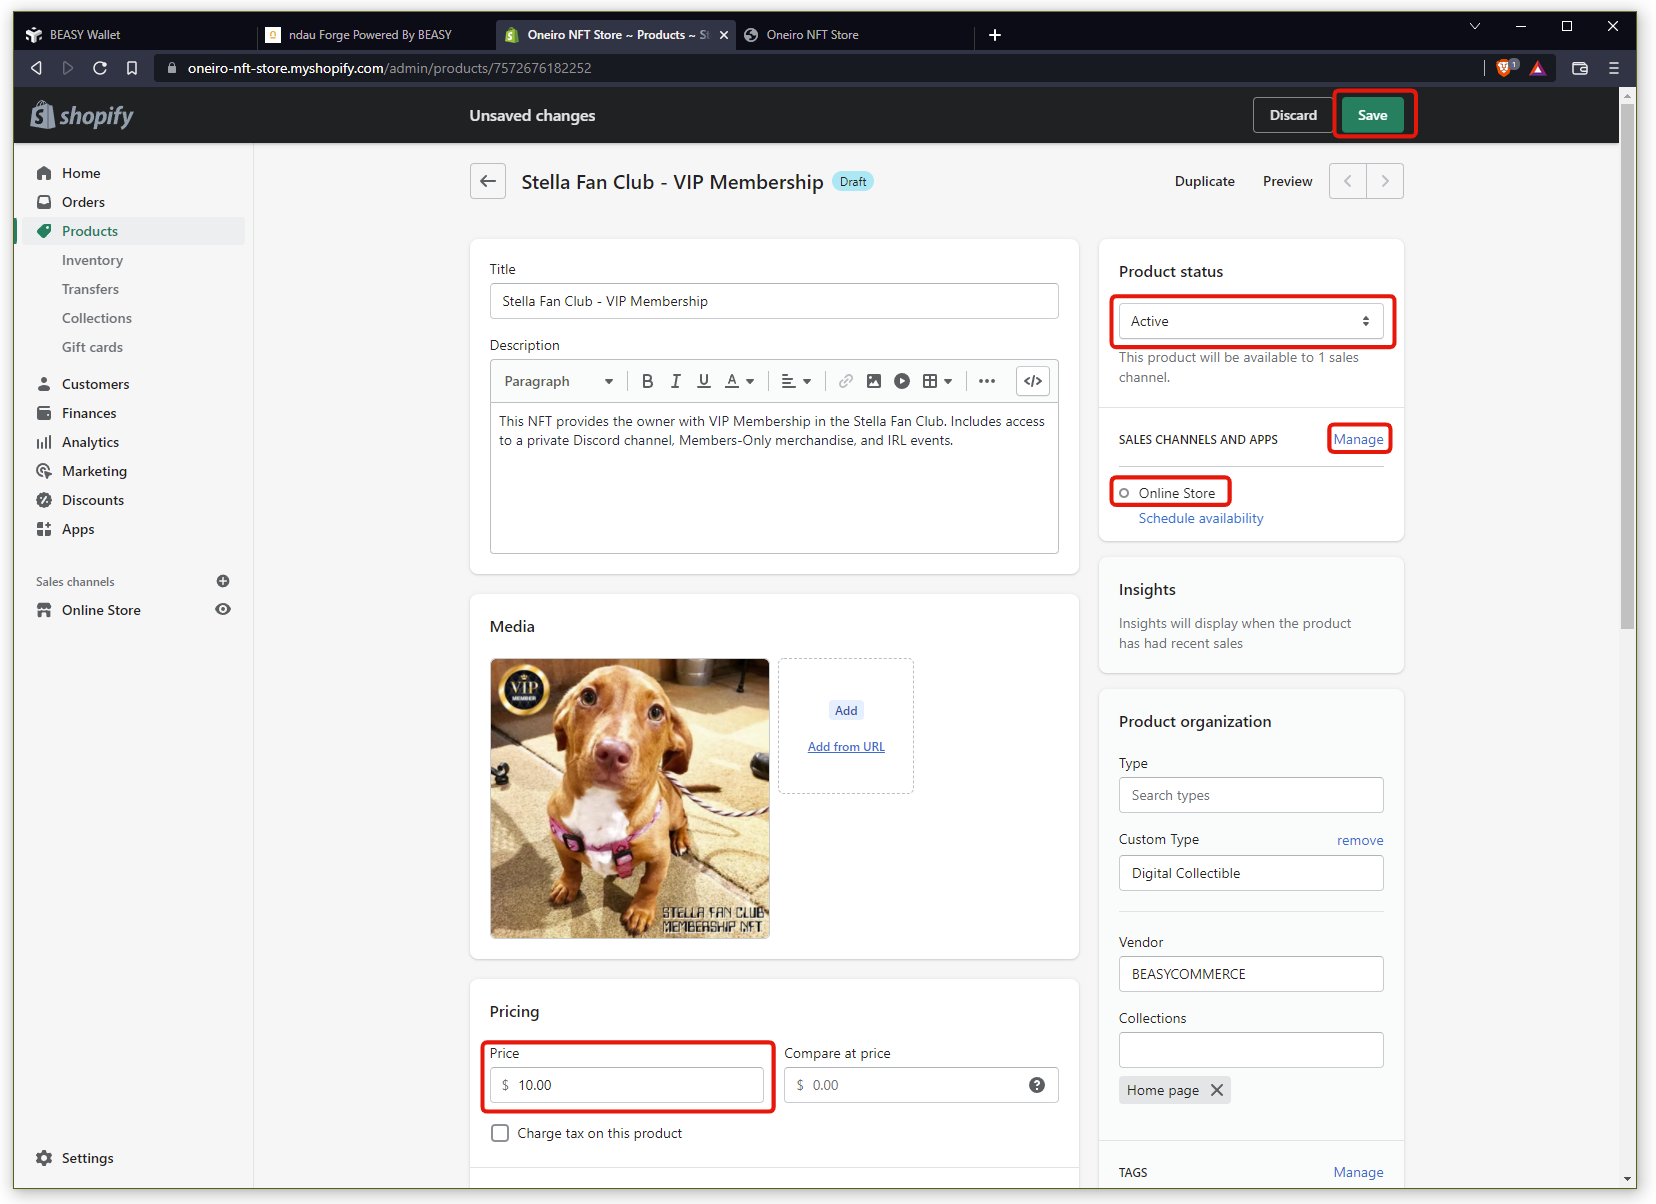
You can see that the Title and Description have been automatically entered from your ndau NFT Forge.
Go to Product status and set the product as Active.
Go to SALES CHANNELS AND APPS, click Manage and enable your NFT to be sold in your Online Store.
Finally, set a Price for your NFT and then click the Save button to save everything.

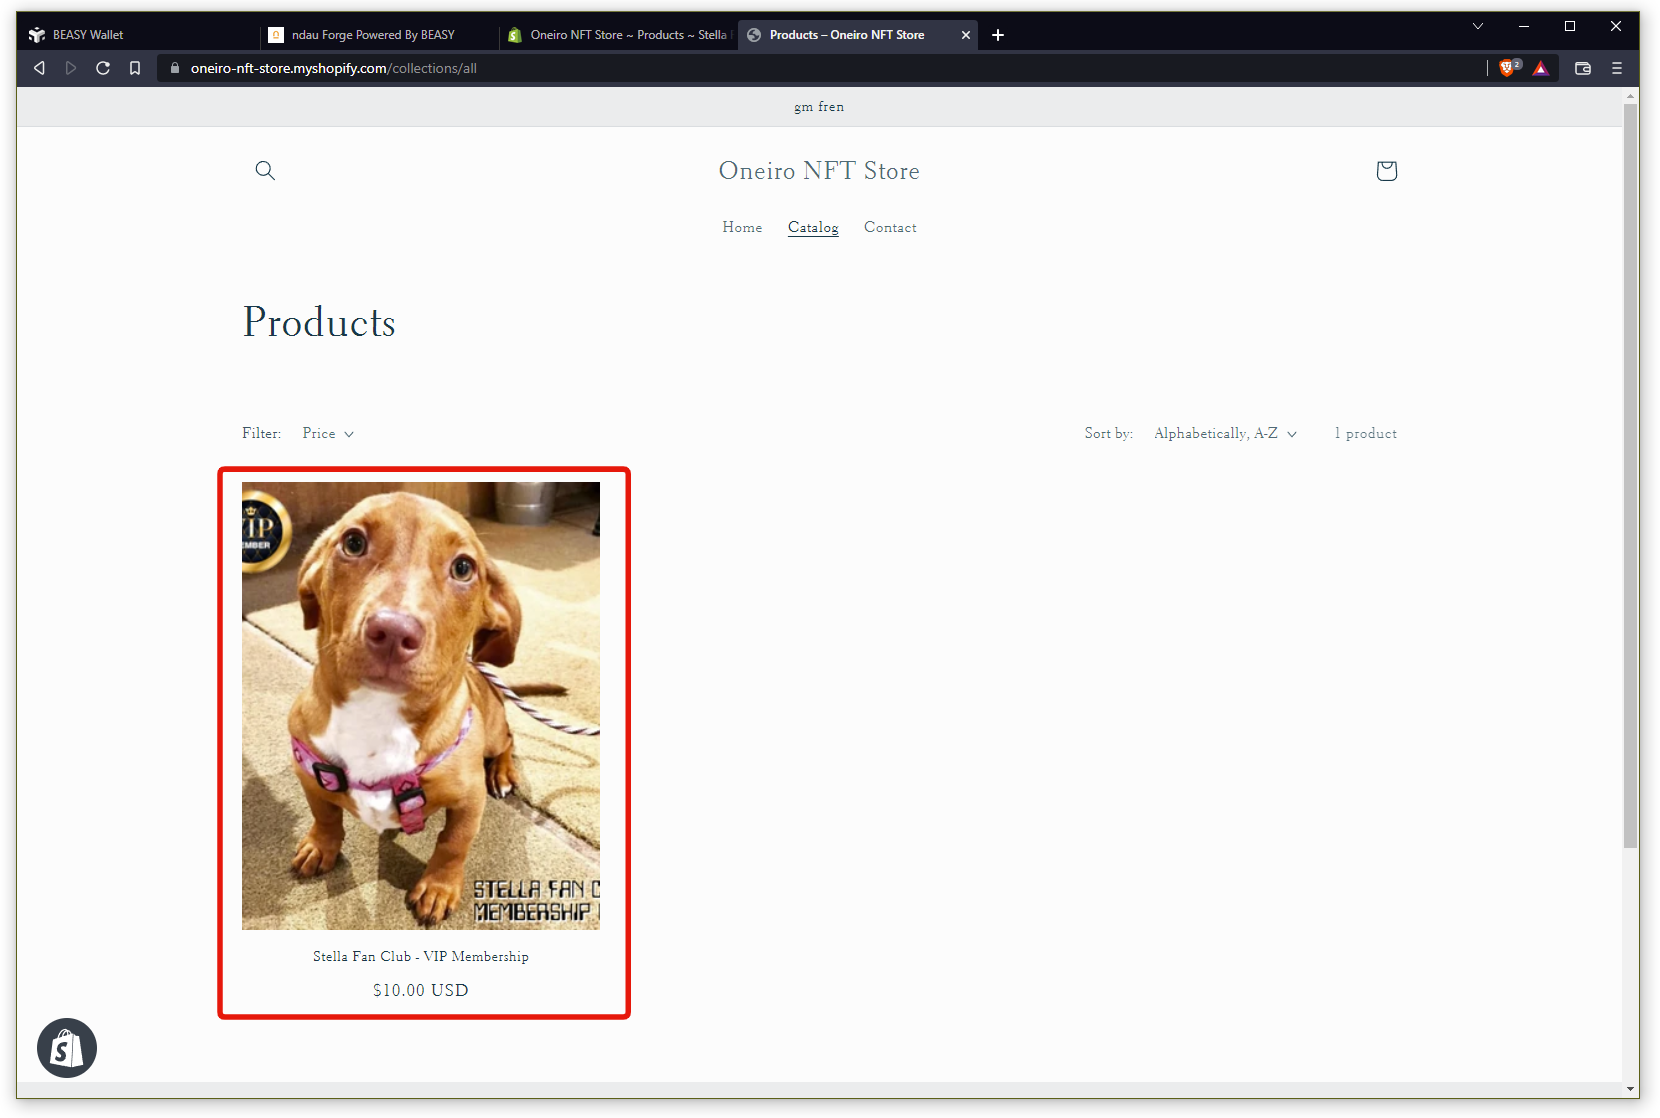
Take a look at the publicly viewable Products section of your Shopify store, and you’ll now see your NFT available for purchase in your Catalog.

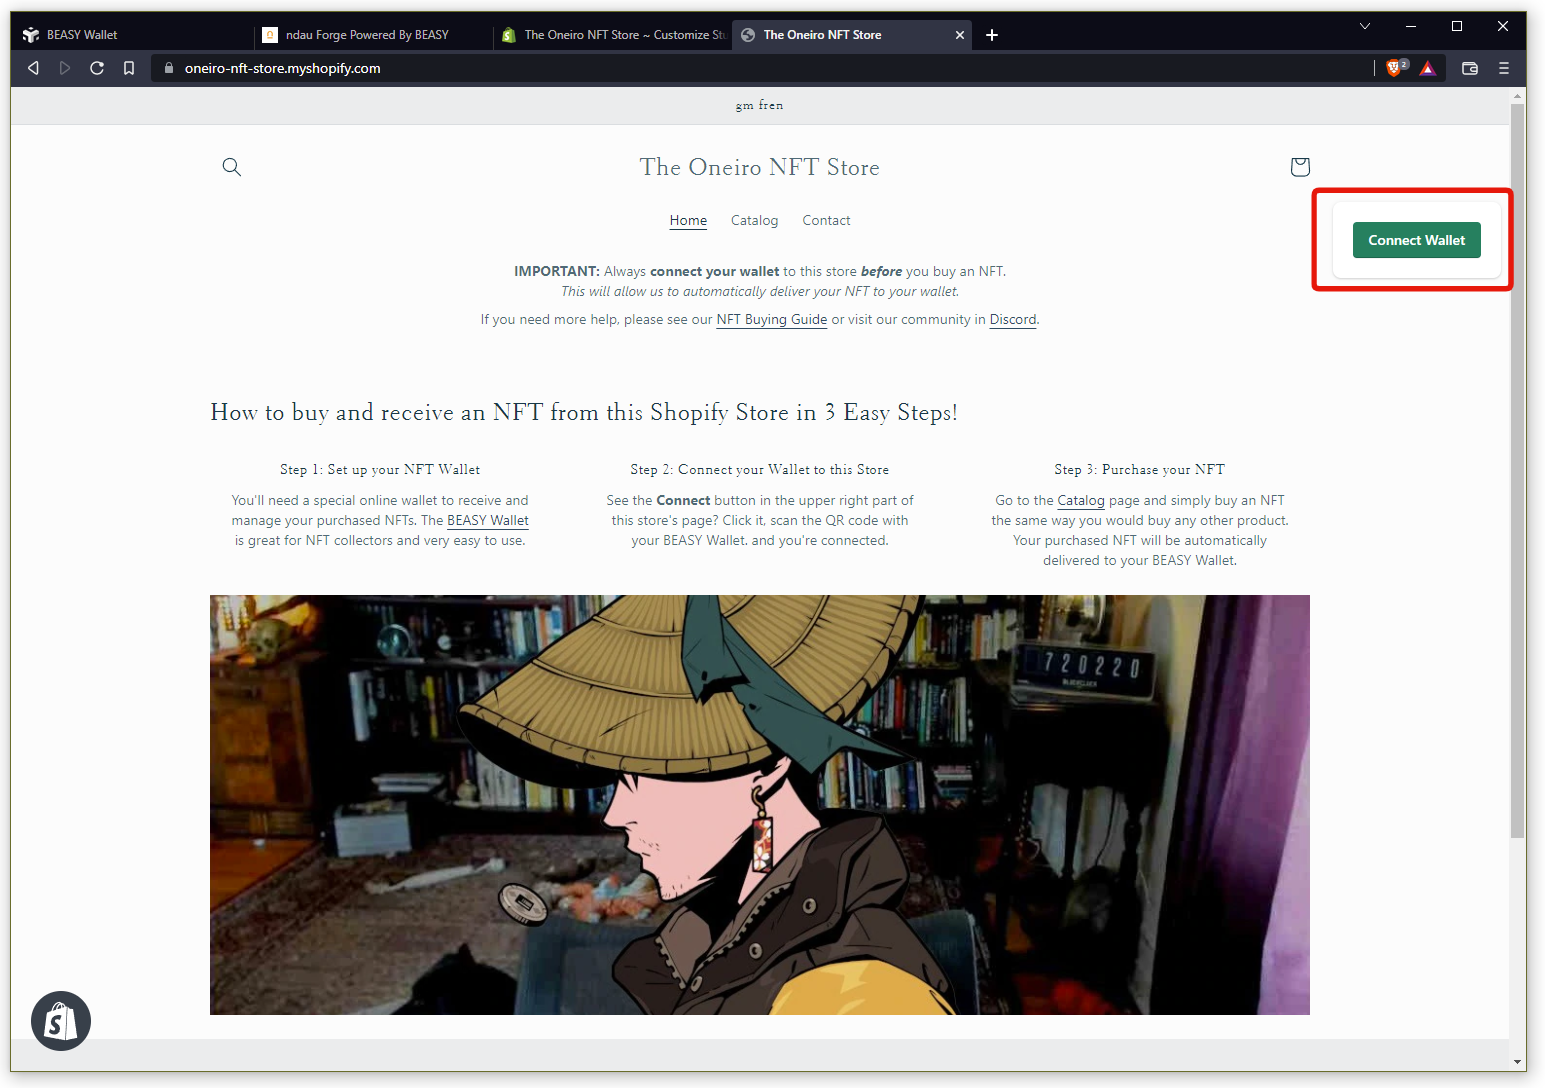
You should now see a Connect Wallet button on your store so your users can connect their wallet and have their purchased NFTs automatically delivered to them.

If you do not see a Connect button on your store or if you have any issues at all regarding connecting your Forge to Shopify, please contact beasysupport@easybeasy.com for assistance.
[ Proceed to Step 8: Buying an NFT on your Shopify store ]